Gerudo Tower
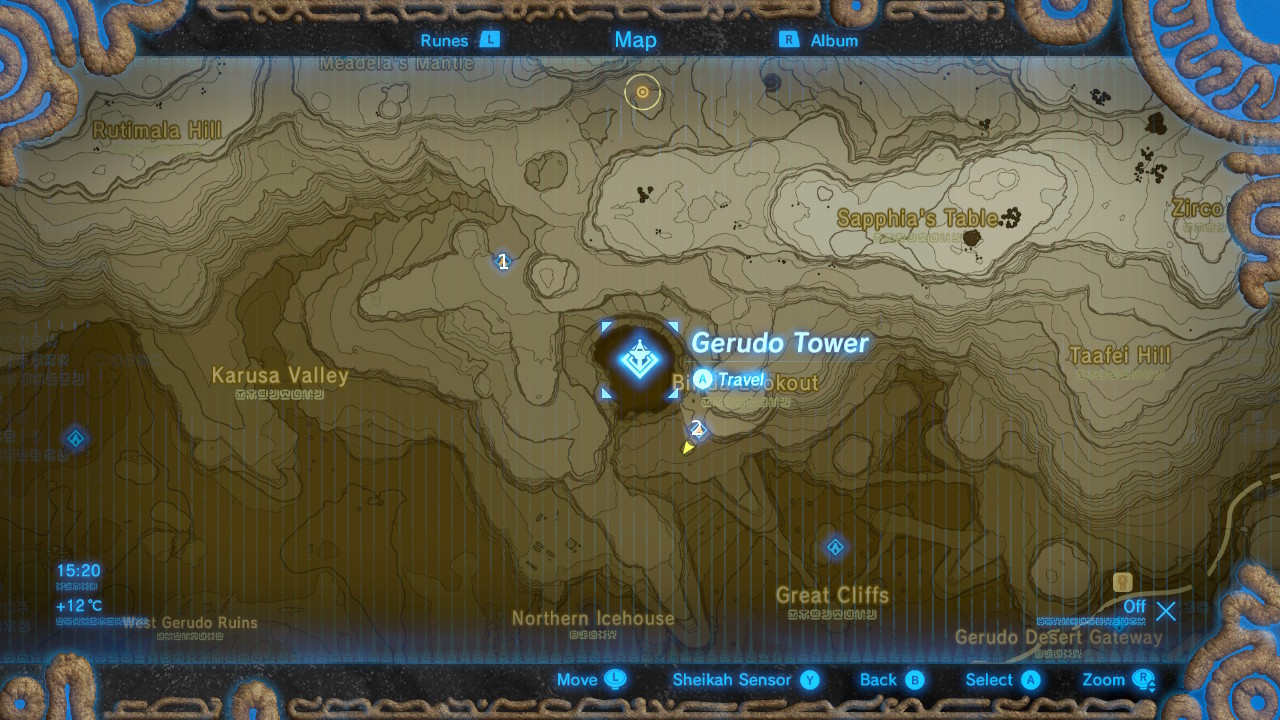
#1 - Sho Dantu Shrine

There are a few luminous stone ores dotted around the pedestal for this shrine, which is handy because you need to drop a luminous stone onto it to reveal the shrine.
Blow up the wooden crates on the left when you enter the shrine to enter the next room.
Place a cube bomb onto the launcher and detonate it when it reaches its highest point to activate the crystal to open the right-hand door back in the main room. Swing around behind the base of the pillar and open the chest before going to the room that's now accessible.
We have to drop another cube bomb onto the launcher in here, but to activate the launcher, we have to drop a round bomb next to the crystal that's behind the pillar. Detonate the round bomb first, then switch to the cube bomb sharpish and detonate it at the top of its ascent to open the door to the last room.
Pop a cube bomb onto one of the launchers and it'll land on the platform above. Now drop a spherical bomb onto the launchers and it'll be tosses backwards and forward between the two.
Step onto one of the platforms and detonate the cube bomb to raise them. Now turn to face the room where you can see the spherical bomb getting tossed about. You'll want to detonate it at the peak of its arc, when it passes over the crystal, to open the door to the altar.
#2 - Sasa Kai Shrine

Talk to Kass at the top of Gerudo Tower to start the Sign of Shadows shrine quest, then glide down to the pedestal that you can see to his right.
The pedestal will glow orange between 3 PM and 4 PM, and when it does, stand on top of it and shoot an arrow towards the top of Gerudo Tower to make the shrine appear.
Inside awaits a Guardian Scout III with an HP of 1500 wielding two '+' melee weapons.
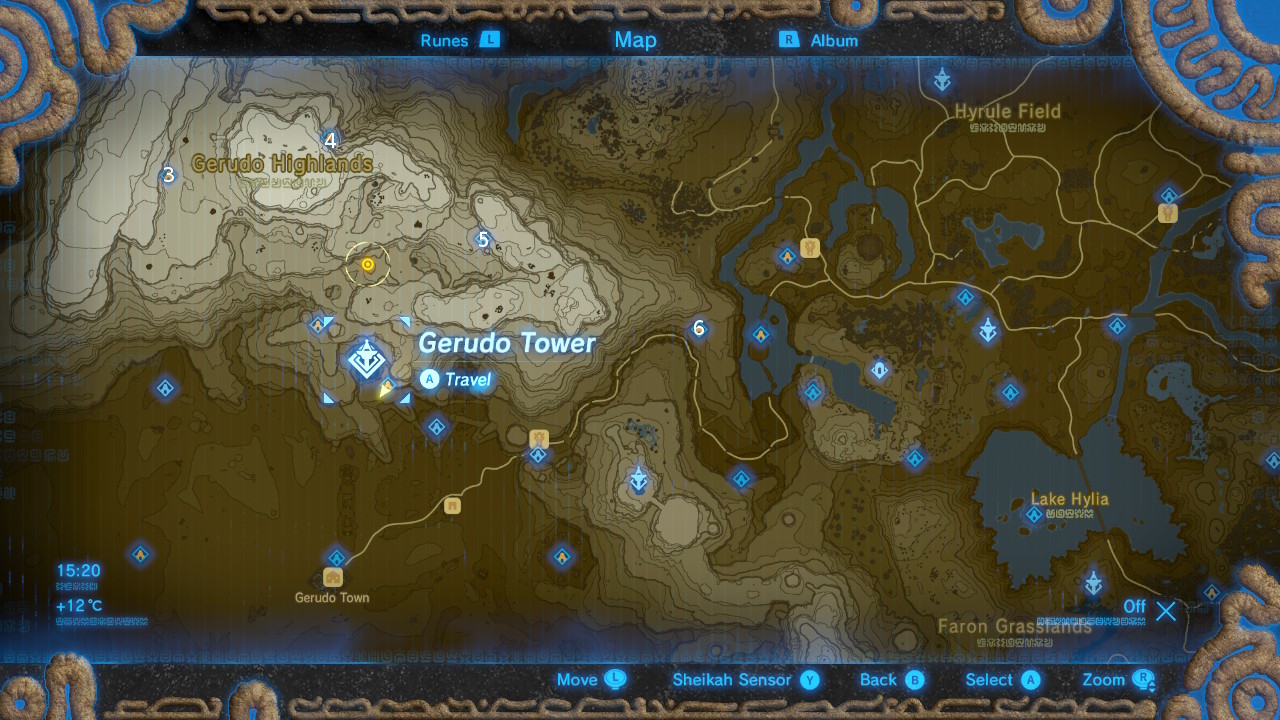
#3 - Kema Kosassa Shrine
You'll find this shrine at the base of Mount Agaat. There's a Guardian Scout IV waiting for you inside, armed with three '++' melee weapons, with an HP of 3000.
#4 - Keeha Yoog Shrine

Head to Tabantha Bridge Stable to start this shrine quest. Tabantha Bridge connects the Tabantha Frontier and Hyrule Ridge land masses, and the stable in on the Hyrule Ridge side.
Find Geggle on the cliff next to the stable and ask him what he's peering at to start the Cliffside Etchings shrine quest. If he's at the stable, you can still tlk to him, but you won't be able to get the quest until he's resumed his position atop the cliff.

The etching depicts lighting bolts around a pedestal, and you need to get yourself up there and shoot the pedestal with a shock arrow.
There are a number of updrafts on your journey up the mountain, and one that will take you up, directly in front of the pedestal.
Once you've shot it, the shrine will appear and you can go straight to the altar.
#5 - Kuh Takkar Shrine

This shrine is frozen inside a block of ice. Use your preferred means of melting it and head inside.

The objective is to get the cube of ice to the altar without melting it. Make your way past the three vertical flames and then throw the cube through an opening at the rotating flame.
Drop the cube onto the floor just before the wall flames. You can either walk under them, grab the metal cube from the lava at the other end, bring it back and position it at an angle to block all three flames, then pick up the ice and walk past, or use Stasis on the cube to slide it along the floor and under the flames unharmed. I used an ice weapon and had no issues, so presumably any other type of weapon would work and won't shatter the cube.
You'll need the metal cube to get over the lava, so if you moved it, bring it back. Toss the ice cube over before you go across.
If you want the chest, ignore the ice cube and use Magnesis to move the metal cube down to the left to block the flames in front of the alcove where the treasure chest is. Glide down, open it, and climb up the ladder to get back to ice cube.
Use Stasis to get the ice cube through the wall of flame quickly, and if you want to make doubly sure it won't melt, you can use Magnesis to block the ceiling flames along its path, so when Stasis wears off, it'll pass by untouched. You can also lob it through.
With the ice cube safey on the other side, use Magnesis to block the flames so that you can pass through without getting singed.
Grab the ice cube and walk over to the altar. The gate will open and you can get out of here.
#6 - Joloo Nah Shrine

You can glide to this shrine from Wasteland Tower but you'll need a lot of stamina. Glide slightly to the east of north, and look out for two circles on the ground as you head towards the edge of the area with sand coloured rocks.

Talk to the three Gorons to start the Test of Will Shrine quest.
For the first part of the test, you'll need Level 2 heat resistance. The Gerudo outfit and an ice weapon will get you through this one.
The second part of the test requires Level 2 flame guard. You'll have to use an elixir (cooking monster parts with fireproof lizards or smotherwing butterfles) as armour with the flame guard effect isn't allowed.
The elixir will need to last for at least two minutes, and don't forget to remove any wooden weapons and shields so that they don't get destroyed.
Once you pass the tests and the shrine appears, head inside.
Interact with the terminal, and using the gyroscope in the controller, rotate the cube so that all of the points on the sides are activated by the crystal above it, to open the gate.
In the second room, use the gyroscope to tilt the cube so that the wind streams create an X shape, and three of the windmills are spinning. Use the stream to glide over to the platform with chest in the corner to the left of the entrance.
Back on the main platform, use Magnesis to move the metal cube onto the floor switch on the right platform to raise the windmill. This will lower the left one, but the raised one should now be spinning.
Glide down to the left platform and step onto the floor switch to raise the windmill. All four will be in the wind stream and the gate will open. Use Stasis on the switch so that you can run through the gate before it wears off and closes.
In the last room, you need to rotate the cube so that all of the torches light up. To make this a lot easier, look up to spot the wooden ledge with a chest on. Burn the ledge so that the chest falls down and use Magnesis to put it on the floor switch on the left.
Now focus on lighting five of the torches. When you only have one left, use Stasis on the water pump on the right and light the last torch to open the gate to the altar.
Jump to Section: