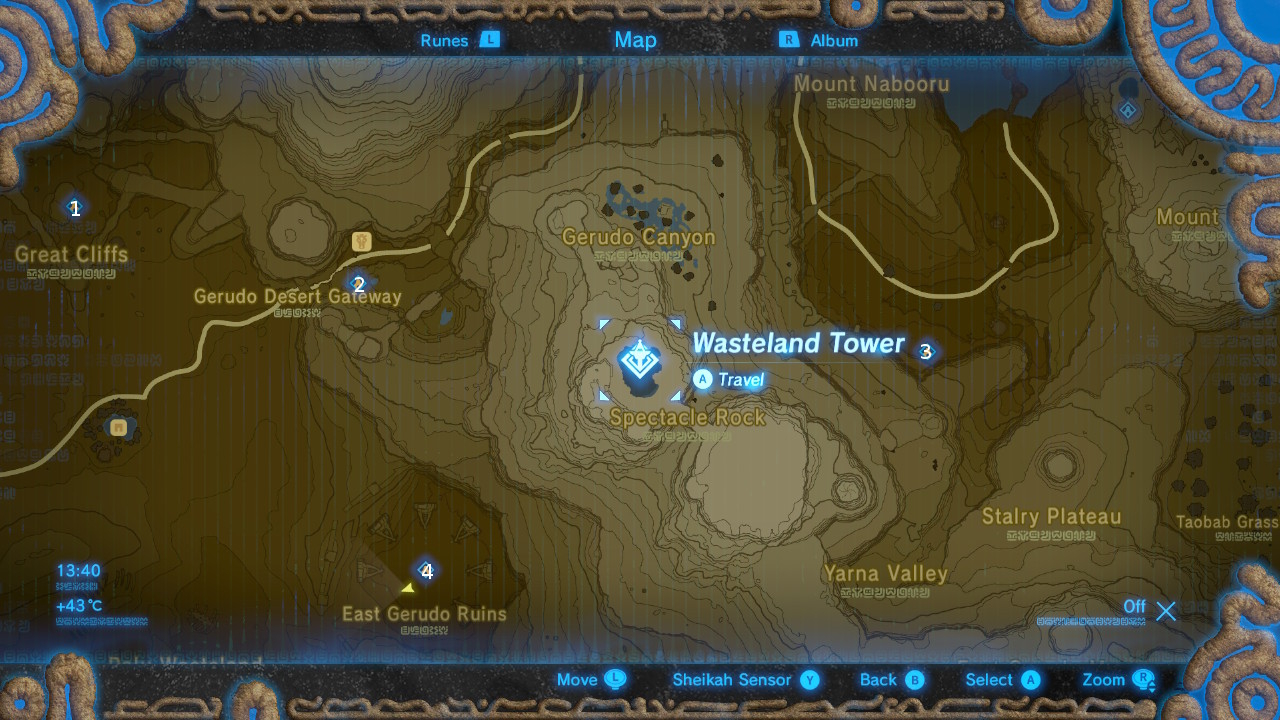
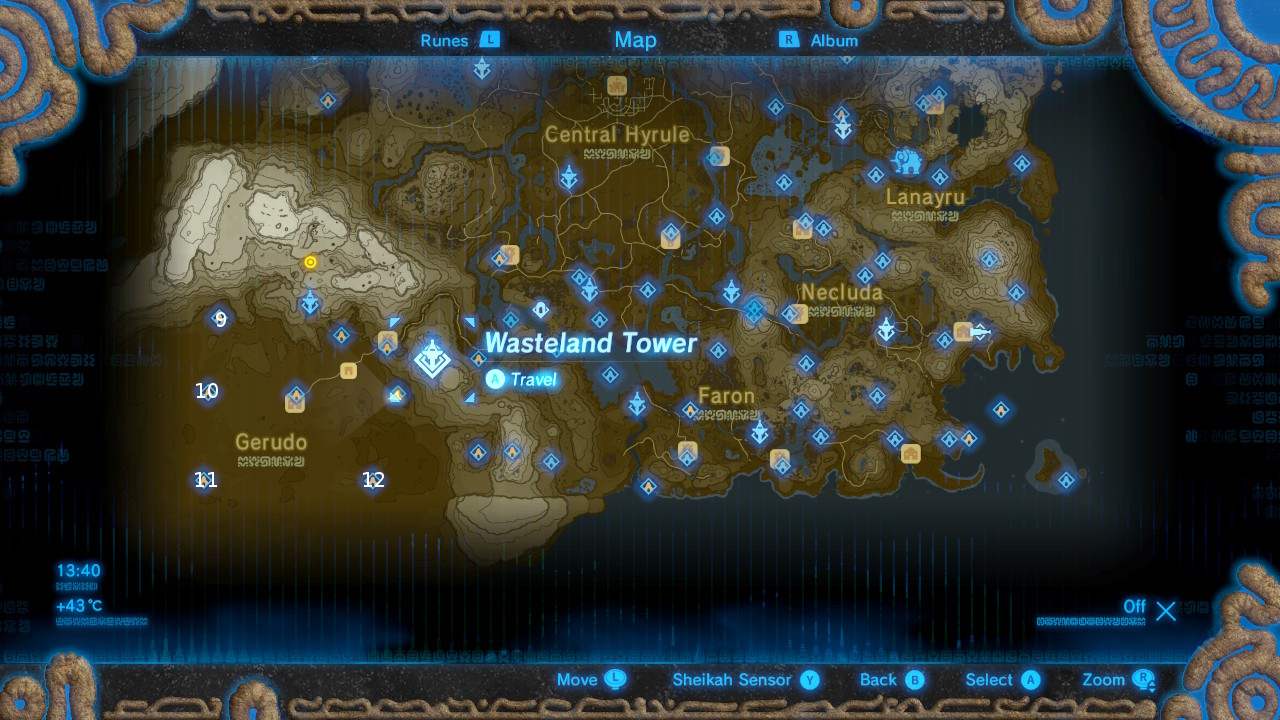
Wasteland Tower
#1 - Dako Tah Shrine

Talk to Nobiro in Kara Kara Bazaar to begin The Eye of the Sandstorm shrine quest. You can find him on the west side peering out towards the sandstorm from a lookout post.
The shrine is to the north of the bazaar, and southeast of Gerudo Tower.

It's on the inside of an L-shaped rock formation, on a small plateau of its own.
Once you're inside, head up the stairs and follow the corridor to the room with the electric cube, taking down the Guardian Scout along the way.
Take the moving platform over to the cube and use Magnesis to lift it up. Keep it close to the cable to power the platform so that you can get back across.
Pick up the cube and carry it up the ramp to the platform with the orange crystal. The cube will power the platform and it'll start moving upward.
There's a treasure chest to open on the way up, so move the cube away from the crystal to stop the platform, allowing you to hop off and open it. It's on a ledge behind you, if you're facing the crystal.
On the next level, take the cube with you and use Magnesis to place it onto the meta plate on the floor below to electrocute the two Guardian Scouts.
Move the cube so that the metal plates aren't electrified any more, and drop down to open the chest underneath the platform.
Use Magnesis to push the large metal cube out of the way so that you can leave this area.
To get the next chest, head down the ramp to the right and hit the crystal to get the platform moving. Hop aboard and it'll take you down to the chest.
Now go back up the ramp and grab the electric cube. Take it with you up the ramp to the left and ride the moving platform to the top. Pop the cube down on the small pedestal to get the final platform moving.
Jump on and use Magnesis to push the metal cube ahead of you. If you want the last chest, stay on the platform as it moves to the altar, turn around, and use Magnesis to drag the metal cube over to the left.
The platform will move back to the corner by the chest and you can jump off to open it.
Get back onto the platform on its way back to the altar and clear the shrine.
#2 - Kay Noh Shrine
This shrine overlooks Gerudo Stable.
Pick up the electric orb in front of you as you enter the shrine and pop it onto the pedestal on the right to open the gate.
In the next room, head to the right to get the orb. Kill the Guardian Scout and cut the rope to free the orb. Take it back over to the left side of the room and drop it onto the empty pedestal. You can now reach the chest that holds the key to open the gate.
Head up the stairs to face another Guardian Scout, and in the final room, use Magnesis to move the metal cubes in the pool on the right so that they conduct the electricity needed to open the gate to the altar.
Before you leave, turn so that the altar is behind you and look up. There's a ledge above the doorway with a metal chest sitting on it. Use Magnesis to get it down.
#3 - Jee Noh Shrine
This shrine is to the east of Wasteland Tower.
In the first room, freeze the conveyor belt next to the pedestal with Stasis and shot the orb with an arrow to knock it down and into place.
In the next room, you need to do the same thing, but there a coupe of Guardian Scouts that will make the task a little harder. You don't necessarily have to kill them to move on, as long as you get the orb into place.
In the next room, use Magnesis to snatch up the treasure chest from the conveyor belt at the back of the room.
Now grab the orb from the pedestal. You need to make it across the conveyor belt holding the orb. You can use the rock cubes as shields from the laser beams.
The easiest way is to use Stasis on the first beam emitter and get to the small platform on the left of the conveyor belt. Wait until the large rock moves closer to the pair of emitters and use stasis on the one closest to you, then pick up the orb and move along the conveyor belt with the large rock cube, which will shield you from the second beam.
The altar is on the other side of the gate.
#4 - Korsh O'Hu Shrine

Talk to Rotana in Gerudo Town to initiate The Seven Heroines shine quest.
You can find her in the building next to the Noble Canteen, down the alley next to the jewellery store.

You have to place the orbs in the correct pedestals to make the shrine appear. There are seven orbs in total.
There are three orbs lying on the sand near the pedestals, and one orb is already in place in its correct pedestal.

The fifth orb is buried in the sand near the sword of the statue at the 12 o'clock position.

The sixth orb is buried in the sand next to the sword of the second statue on the left (from the empty space where you enter the ruins).

The seventh and final orb is on the arms of the statue that's dropped its sword.

Each of the orbs has a pattern on, and to find out which one goes where, you can look for symbols on the statues feet, swords, etc. Or you can just take a look below to save yourself some time.
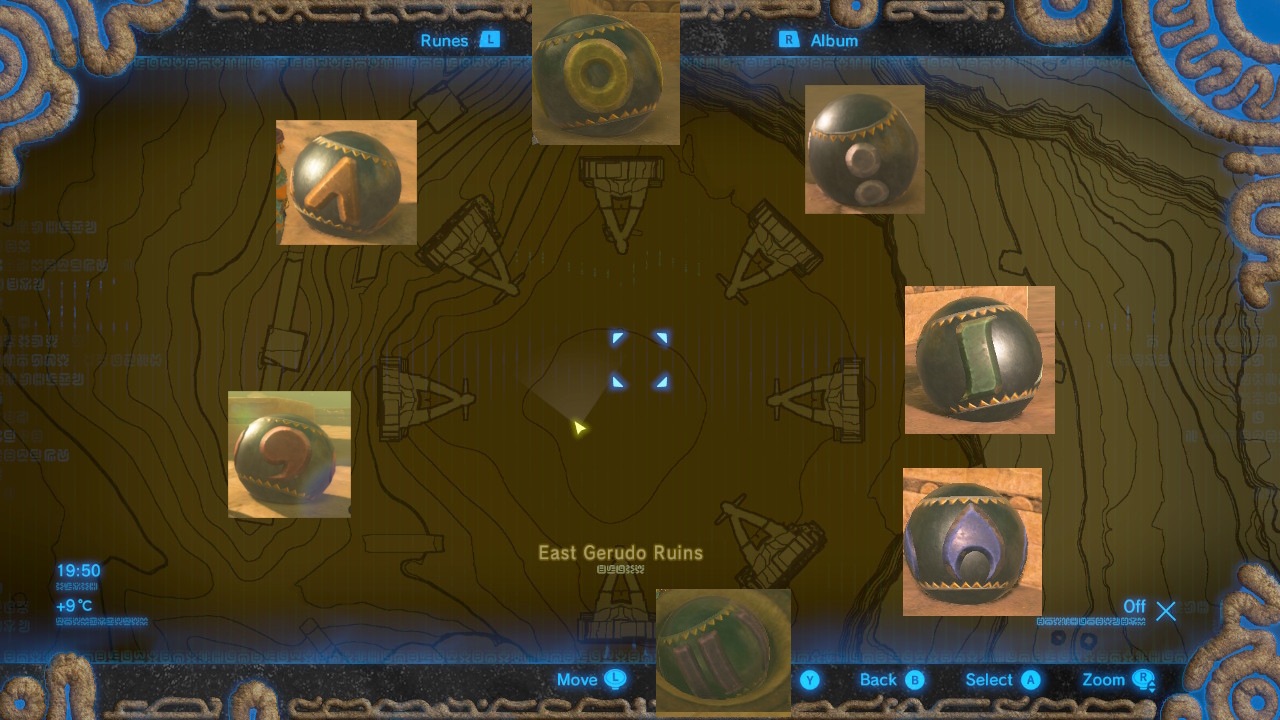
Once you place all of the orbs in the correct positions, the shrine will appear and you can stroll in and interact with the altar.

#5 - Daqo Chisay Shrine
This shrine is right next to the Gerudo Town entrance.
Go down the steps to the let and use Magnesis to position the metal barrel a the end of the longest electric wire. Now use Magnesis to move the metal cube to th end of this new connection. This will open the leftmost gate, giving you access to another metal barrel.
Move the first barrel to end of the shortest wire by the steps on the left. Move the second barrel to the end of this new connection. Move the cube to the end of this one to open the gate with the treasure chest behind it.
Now we're moving over to the right side of the room, and we'll need the two barrels, the metal cube, and the chest to make our connections.
Put a metal barrel at the end of the shortest wire. Move the second barrel to the end of the new connection. Pop the metal chest down at the end of this one. Finally, place the metal cube between the two platforms to complete the connection and open the gate, revealing a second metal cube.
Now take the metal cubes and put them on either side of the steps that lead to the altar and we're done.
#6 - Raqa Zunzo Shrine
You'll need to defeat the Divine Beast Vah Naboris before you can start The Undefeated Champ shrine quest.
Talk to Shabonne at the sand seal rally area south of Gerudo Town and agree to participate in the race. You'll need 50 rupees and at least one shield.
The goal is to finish the race in under a minute and a half. Doing so will net you an orb that you can drop into the pedestal to make the shrine appear.
The shrine challenge was the race, so you can clear it as soon as you're in.
#7 - Dila Maag Shrine
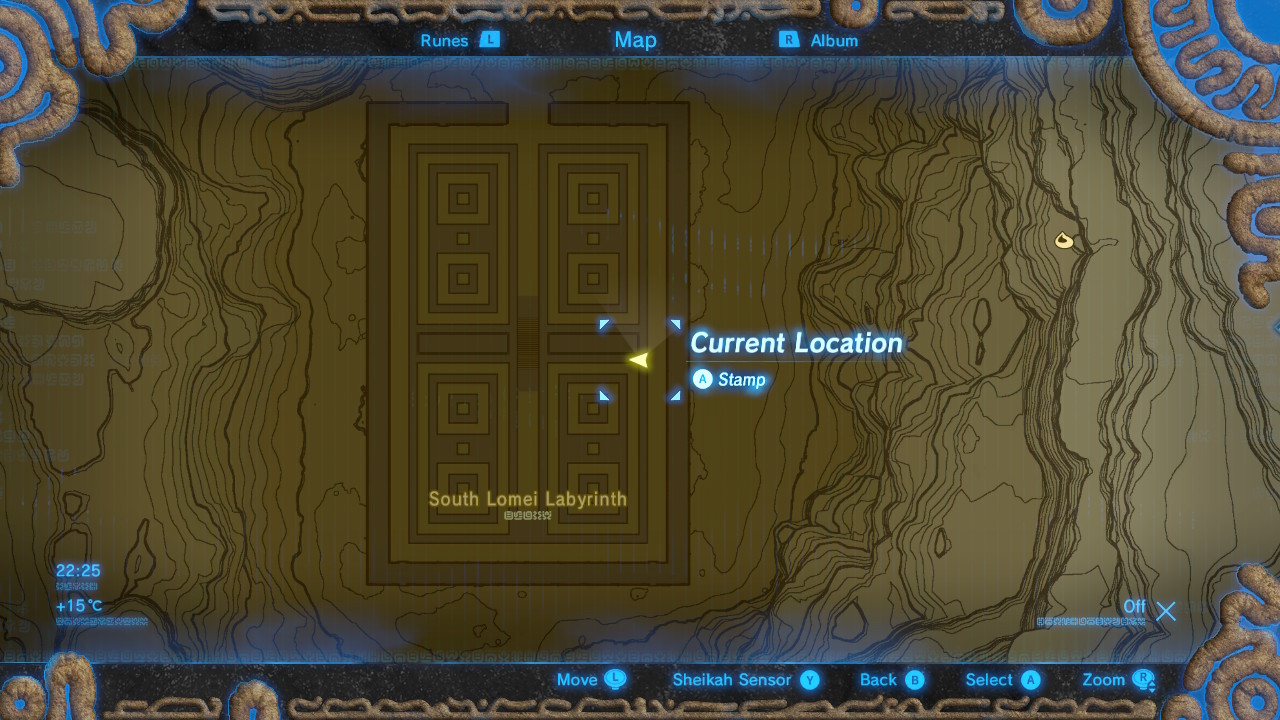
Entering the South Lomei Labyrinth will kick off The Desert Labyrinth shrine quest.
The quickest way to get to the shrine in the middle is to get yourself onto the top of the labyrinth to the position above.

Look down into the labyrinth and you'll see purple Ganon gunk.

Glide down to the far end of the goo and go around to the right to enter a gunk-free corridor.

With the goo on your left, go straight head and around to the left, where you'll spot a couple of torches.

The shrine is at the bottom of the steps leading down from them.
Enter the shrine and examine the altar to clear it.
#8 - Suma Sahma Shrine
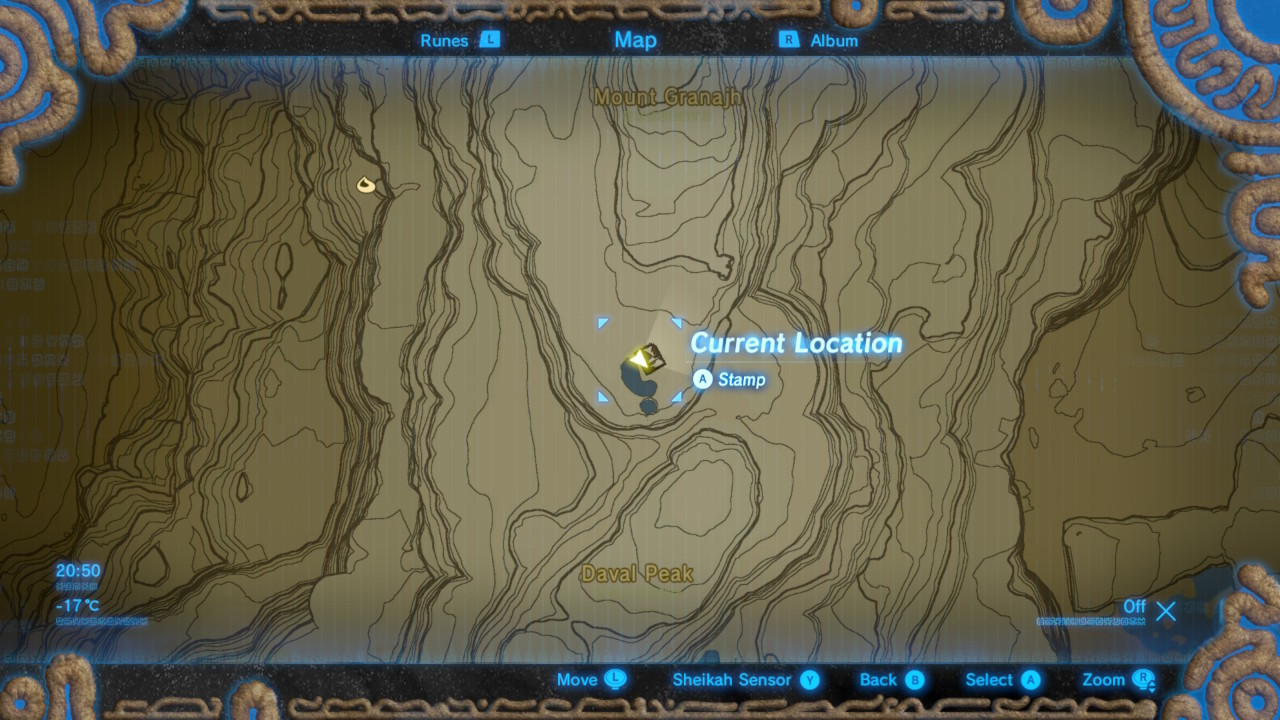
To start this shrine quest, get yourself to the mountain east of the labyrinth. There's a dilapidated shack on the southern end of Mount Granajh, north of Daval Peak.

Read the log inside the shack to start the Secret of the Snowy Peaks shrine quest.

Grab a snowball and hold it above your head so that it casts a shadow on the pedestal on the nearby cliff-face.
Wait until 16:20 to do so, when the sun is in the right position.
Now you can enter the shrine and interact with the altar to clear it.
#9 - Kema Zoos Shrine

Talk to Laine at the northwest entrance to Gerudo Town to start The Silent Swordswomen shrine quest.
Grab a sand seal if you'd prefer to make fast progress, and follow the directions that each of the statues points to find the shine in the sandstorm.
Once inside, you need to grab the electric orb being thrown between launchers. Pick a side on the ramp in the middle and use Magnesis to grab the orb from the launcher when it lands on your side.
Take it over to the back left of the room and drop it onto the ledge behind the fenced area to open the gate to access the chest.
After you've opened it, grab the orb using Magnesis again and take it to the back right of the room. Place it next to the pedestal to open the gate to the altar.
#10 - Tho Kayu Shrine

To reveal this shrine, you need to light the four torches in this area, but there's a Molduga doing an audition for Tremors, and it'll burst out of the sand at any spot that has movement happening on it.
It's actually super easy to beat, particularly if you have a powerful two-handed sword about your person.
From the safety of the rocks, toss a round bomb onto the sand, as its rolling properties are what we need right now. The Molduga will sense it hit the sand and make a beeline for it.

Detonate the bomb when the Molduga is practically on top it and run in to follow up with a charged attack. A spinning charged attack with a two-handed weapon will knock a significant chunk off it HP gauge. Rinse and repeat until it's dead.

You can now light the four torches in peace, revealing the shrine. As you'd imagine, getting the shrine to appear was the puzzle, so you can interact with the altar immediately.
#11 - Hawa Koth Shrine

This shrine is located underneath the Gerudo Great Skeleton along with a Great Fairy Fountain.
To open the first gate, use Magnesis to move the metal cube on the right into the space on the left of the electric crystal, in the nook between the two small pillars and the orange crystal.
Move the second cube into the space diagonally opposite, so that it's sitting between the two small pillars and the electric crystal.
In the next room, use Magnesis to pull the chest out of the water on the right. Now use Magnesis on the electric orb chained to the electric crystal and move it over to the orange crystal to power the lift to the next level.
Take care of the Guardian Scouts, then lift the metal orb in front of you with Magnesis. Carry it across the bridge, holding it up above you so that it doesn't activate the orange crystals, as this will flip the bridge up to a vertical position.
At the halfway point, look up to the right and you'll see a pedestal on a ledge poking out of the wall. Pop the orb onto the pedestal to open a pathway to a chest.
Pick up the orb with Magnesis again, carry it across to the gate by the altar, and drop it onto the pedestal before going through the doorway on the right to the final room.
The floor switch here will tilt the three rock platforms back and forth. To complete the connection, use Stasis on the cube closest to you in the middle column. Now step on the floor switch and when the other platforms slide away, use Magnesis to pull the metal slider across to the right so that it's positioned across the middle and right-hand columns. When you step off the switch, the platforms will slide back and the connection will be complete.
You can now grab the cog and open the chest. Take the cog back to the altar gate and slot it into place to clear the shrine.
#12 - Misae Suma Shrine

When you arrive at the shrine, you'll find Pokki collapsed over the pedestal. Talk to her to initiate The Perfect Drink shrine quest.

Head back to Gerudo Town and talk to Furosa at the Noble Canteen, which is located in the alley next to the jewellery shop.

She'll send you to the ice house and agree to meet you at the other side of the ruins. Make the trip during the day and either clear out the enemies on your way, or sneak past with the ice after you collect it.
Drop the ice block in front of Furosa and return to Pokki to move her out of the way so that you can clear the shrine.
Jump to Section: