Lake Tower
#1 - Pumaag Nitae Shrine
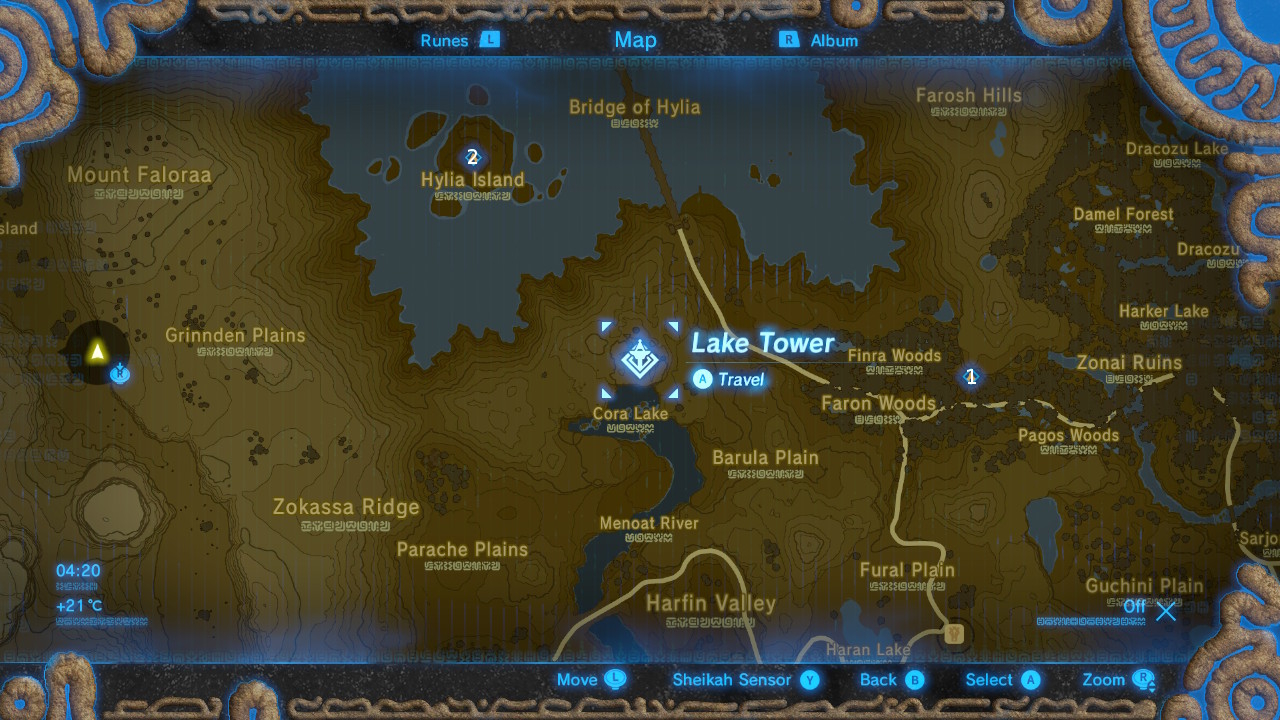
The shrine is located between Finra Woods and Pagos Woods, just off the main road.
To clear it, you have to defeat the Guardian Scout II inside that has an HP of 375 and wields a standard melee weapon.
#2 - Ya Naga Shrine

This shrine is on Hylai Island, tucked away in the middle.
The objective is to propel the cube upwards by depositing a spherical bomb into the shoot underneath it. Before you do that, walk up the stairs and drop a cube bomb onto the top of the cube.
Detonate the spherical bomb you dropped into the shoot to send the cube flying towards the destructible ceiling. Quickly switch to the cube bomb as it reaches the peak of its ascent and detonate it to blast open the ceiling.
Pop another spherical bomb into the shoot below the cube and hop aboard. Detonate the bomb and you'll be propelled upwards. Glide down to the pillar on the right (if you stood on the cube with the shrine entrance behind you) and land on top of it to open the chest.
When you're done, make your way to the altar.

#3 - Shae Katha Shine

This shrine is hidden behind the statue at the Spring of Courage, but you'll need to speak to Kass to initiate The Serpent's Jaws shrine quest.
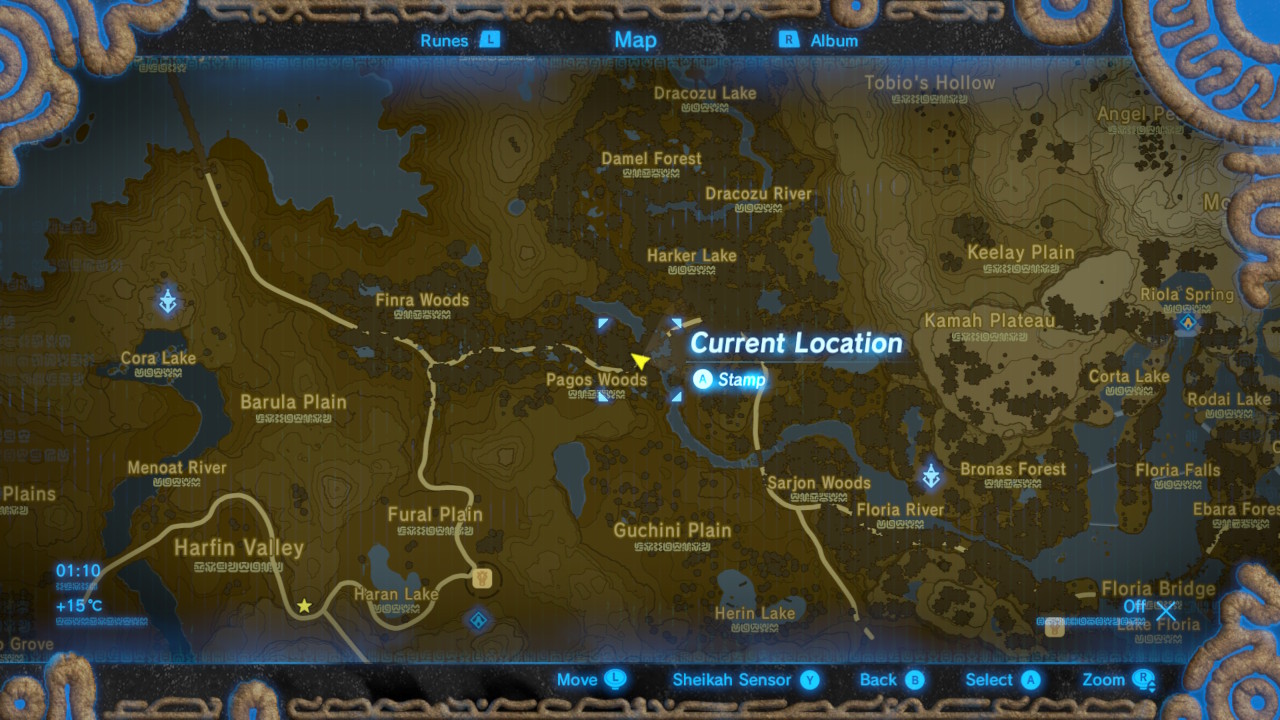
You can find him in Pagos Woods on the west side of the bridge that crossed Floria River.

The objective is to shoot the thunder dragon Farosh anywhere on its body to get a scale. One of the places you can find Farosh is in Riola Spring, which is at the summit of a bunch of waterfalls, to the east of Faron Tower. The dragon will come out of the water and make its way down the mountains.
Any scales you don't immediately grab can be picked up from the water as they get swept down the waterfalls below.
Return to the Spring of Courage and drop the scale in the water to reveal the shrine. The hard part's over, so you can clear it as soon as you walk in.
#4 - Ka'o Makagh Shrine
This shrine overlooks the Hihghland Stable.
Use Magnesis to open the doors into the main area. There are two Guardian Scouts in here, so take care of them before proceeding.

There's a chest hidden in this room. Go around to the back of the platform that has the cubes stacked on top it and use Magnesis to identify a the metallic cube in the wall. Pull it out reveal a chest.

The second chest is behind the metallic doors to the left (as you enter the main area).
Blow up the destructible wall holding the left side of these doors in place. Use Magnesis on the door to form a bridge between the platforms, and use it again to bring down the chest from the top of the cube stack.
Use the door to form a bridge to the altar. Don't forget about the metal cube we moved earlier if you're struggling to get the door in place.
#5 - Shoqa Tatone Shrine

Talk to Loone on Puffer Beach to initiate the Guardian Slideshow quest.
You need to take pictures of a Guardian Scout, a Guardian Skywatcher, and a Guardian Stalker to get the orb from her.
Guardian Scouts can be found in a number of shrines - Ka'o Makagh, for example - while both Skywatchers and Stalkers can be found at Hyrule Castle.
Return to Loone with the photos and she'll give you the orb. Pop it onto the nearby pedestal and enter the shrine.
You'll be pitted against a Guardian Scout II with an HP 375 and one standard melee weapon.
Defeat it to clear the shrine.
#6 - Ishto Soh Shrine

This shrine can be found on a plateau east of Daval Peak. There's a woman attempting to cook nearby and the smoke from her failed concoctions can be seen from fairly far out.
Inside the shrine, go down the ramp and around to the right. Use Stasis on the block emitting the laser beam and open the chest that's now accessible.
Pick up the block and drop it on the moving platform, facing the crystal, so that it switches it on and off as it moves from side-to-side.
Head back up the ramp and onto the discoloured platform between the two blue lights. From here you can glide over to the now-moving blocks on the opposite side of the room. You can make your way across the moving pillars to reach the second chest.
Drop down from here and head up the steps to the platform. These will also move up and down as the laser beam hits the crystal. The altar is at the top.