Faron Tower
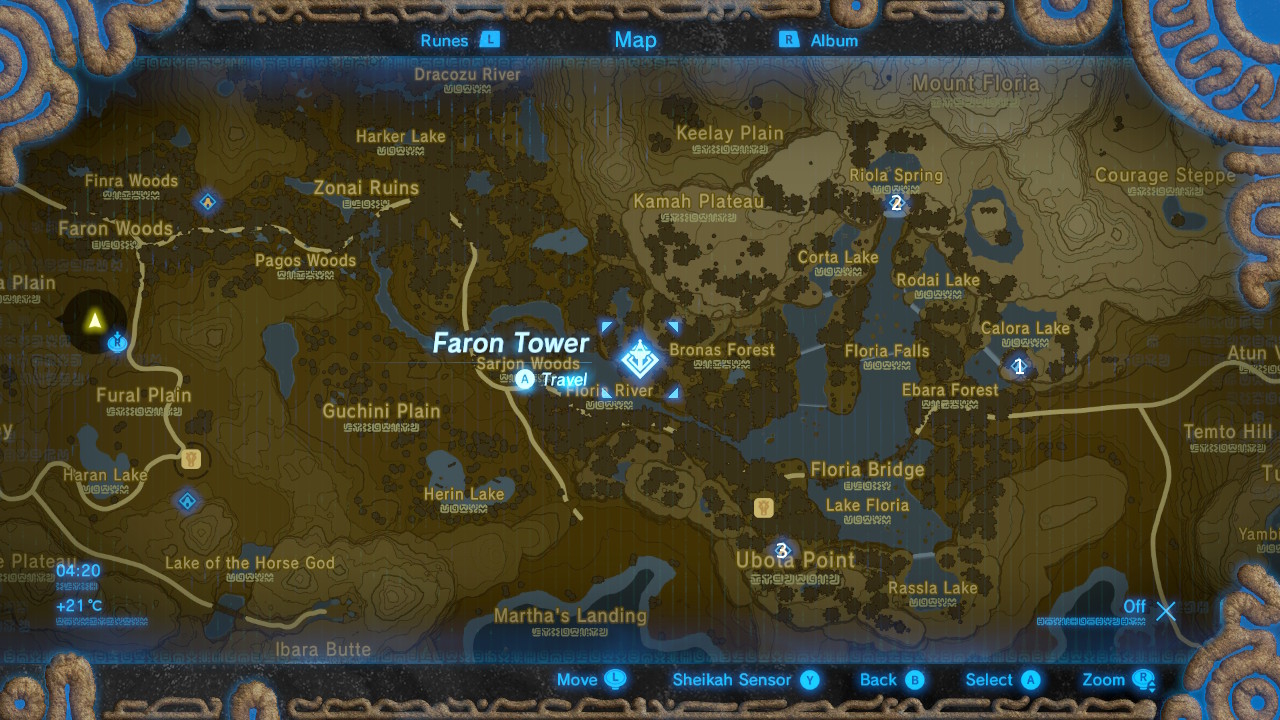
#1 - Qukah Nata Shrine

Talk to Kass near the big mound here to initiate the A Song of Storms shrine quest.

To reveal the shrine, you have to make a lightning bolt hit the top of the mound. You can either stand in the centre at the top wearing metal equipment, or drop metal shields and swords onto the top, but they have to be in the centre for it to work.
Bear in mind, if you get zapped, you'll take damage, and whichever method you choose, you'll need to locate your gear afterwards because make no mistake, it will go flying.
The puzzle of finding the shrine was the hard part, so nip in and interact with the altar to finish up.
#2 - Shoda Sah Shrine

This shrine is inside a cave, the entrance to which is on the right side of the waterfall.
To solve the puzzle, you need to get the orbs into their holes on the platforms. The quickest and easiest way to do this is to pick up an orb and wade into the water via the ramps on either side. Use Cryonis to make an ice pillar underneath it, climb on top, and thrown the orbs onto the platforms.
Now open the chests have landed near the launchers to get the key to the gate in front of the altar.
#3 - Shai Utoh Shrine
This shrine is hidden behind a destructible wall by Lakeside Stable. Head around the stable to the left and continue to the cliff-face to find it.
Once inside, use Stasis to freeze the ramp and head up to the next level. Freeze the next ramp and use it to head up to the platform on the right to open the chest.
Step back onto the ramp to lower it, freeze it in place, and make your way up to the opposite platform. Use Magnesis on chest to take it with you.
Step onto the low end of the see-saw in the last area, and drop the chest you brought with you onto the high end to send you soaring up into the air, allowing you to glide over to the platform with the second chest
Drop back down onto the see-saw and walk up to high end. The chest you dropped will hold it in place. Use Stasis to freeze the next platform and walk across to the altar.
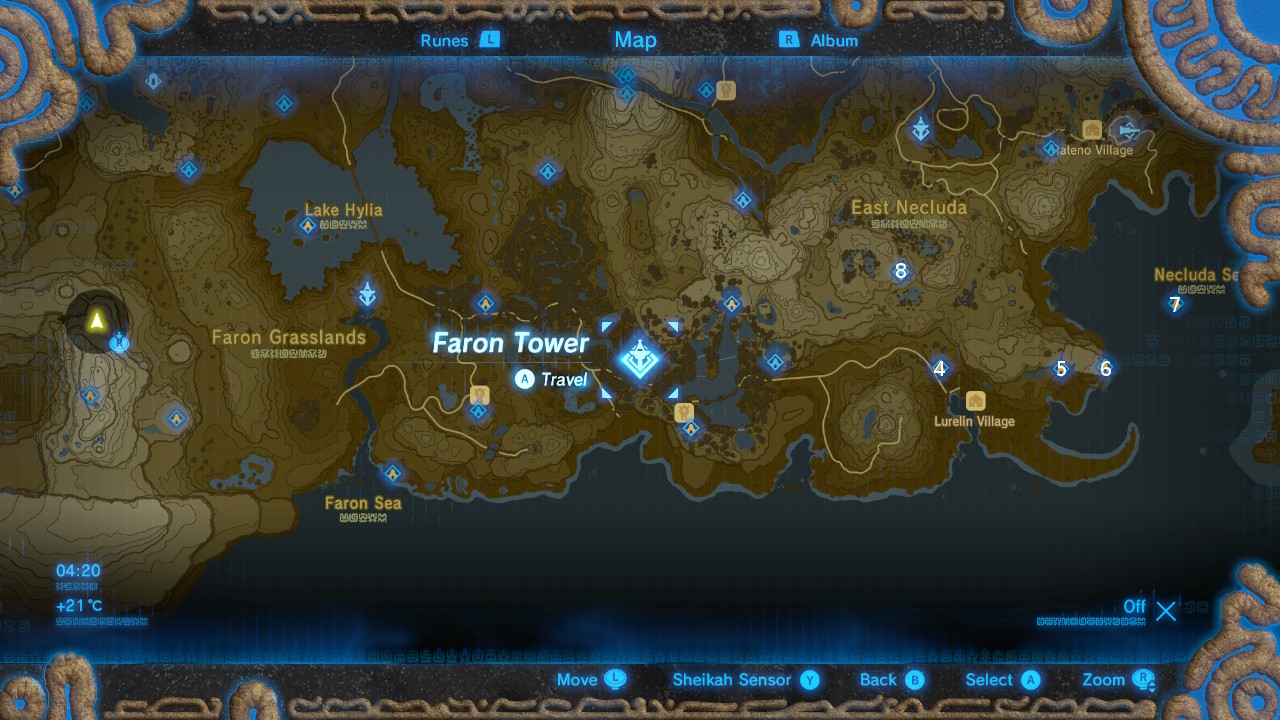
#4 - Yah Rin Shrine
This shrine is on a plateau overlooking Lurelin Village.
Step onto the low side of the scale and use Magnesis to move the metal cube onto the high end, allowing you to access the platform above.
Take care of the Guardian at the bottom of the steps and use Magnesis to lift the chest out of the fenced area. Pilfer the contents and use Magnesis again to pop it on top of the floor switch behind the fence next to the gate.
In the next room, look to your right to see the floor switch with the chest on it. Grab the chest with Magnesis and pop it onto front left pan to lower it. Now move it to the pan at the back left to lower this one as well. Jump onto it and over to the left platform to open the second chest.
Step back onto the pan and use Magnesis to move the chest onto the back right platform (the one now in front of you. Hop onto the lowered pan and move the chest back to the back left pan again to raise yourself up.
You can now hop over to the altar.
#5 - Kah Yah Shrine

There's a small child running around Lurelin village by the name of Zuta. Talk to him and he'll lead you to the ruins where you can find Garini who will give you the A Fragmented Monument shrine quest.
Your task is to find the three stone fragments and take pictures of them to bring back to him. The writing on the fragments glows blue at night, making them easier to identify.
The first one isn't far from Garini.

With the ruins behind you, walk a little way down the beach and you'll spot some palm trees to your left.

Snap a picture of the fragment near the cliff-face.

The second one is also close-by.

With the runs behind you, walk towards the sea and you'll spot a path leading off to the right.

You'll spot some crates and barrels in the water. The fragment is resting on the rocks.

The last one is at Soka Point.

It's next to the palm tree on the tip.

Go back to Garini and once he's done talking, crouch on one of the pedestals. He'll follow suit and the shrine will reveal itself.
The chest inside on the left has the key to the gate blocking access to the altar. Head up the ramp on the left, pick up a wooden barrel and step onto the moving platform with it.
Stay on the left to avoid being pushed off by the first metal grate. Now drop the barrel onto the right side of the platform and crouch down to pass beneath the second grate.
Step over to the right side of the platform where the barrel is resting to avoid getting pushed off by the third grate. Pick up the barrel and pop it onto the floor switch to access the chest with the key.
To open the gate to the second chest, pick up a wooden barrel on the right side of the room and step onto the moving platform with it.
There's a crystal on the right that controls the two gates that the platform moves beneath. Put the barrel down onto the platform and hit the crystal with an arrow just before you get to the first gate.
As soon as you pass through, take aim at the crystal again and shoot it before you reach the second gate. Having passed through, you can pop the barrel on the floor switch and go back to open the chest.
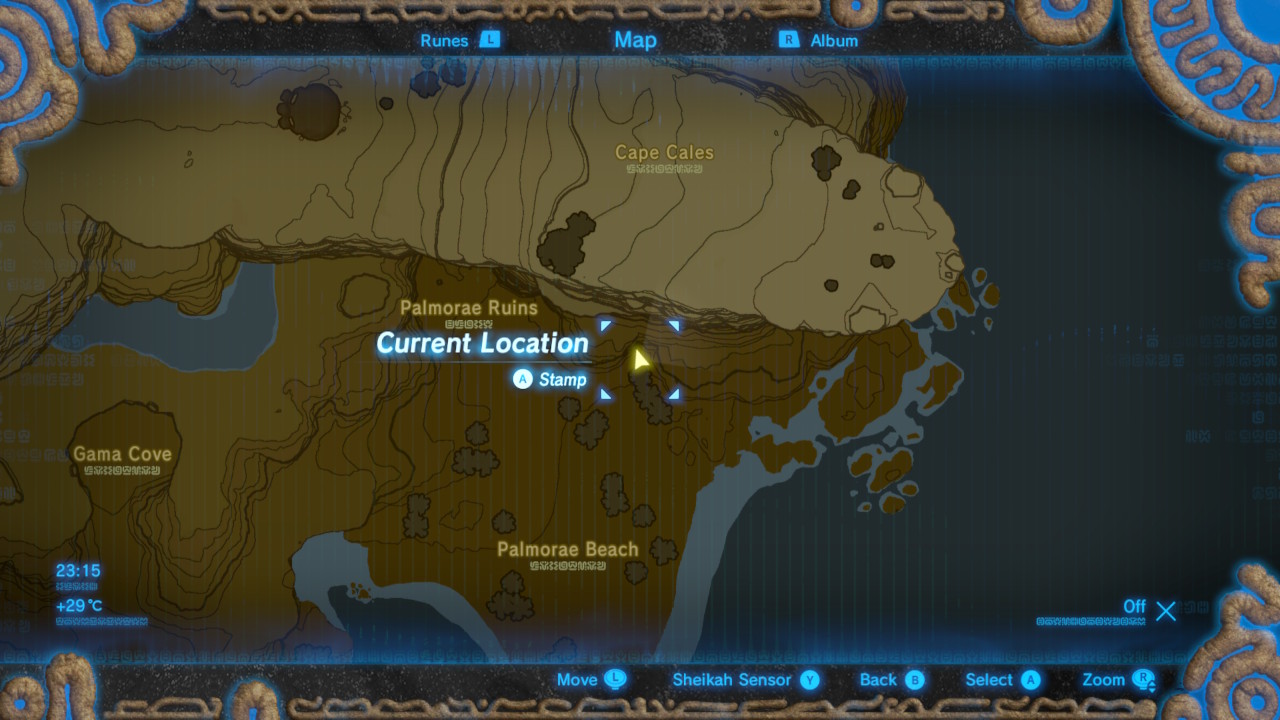
#6 - Muwo Jeem Shrine
The shrine is brazenly sitting at the top of Cape Cales and requires you to beat a Guardian Scout II with an HP of 1500 and two '+' melee weapons.
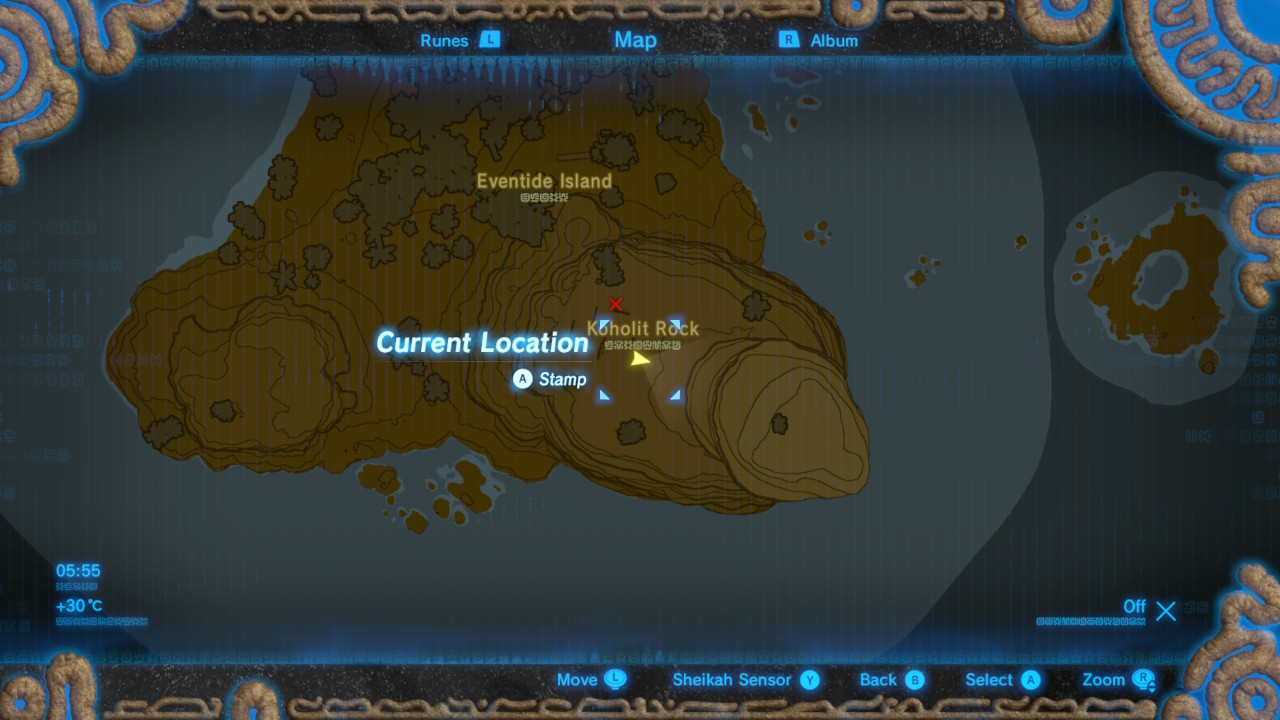
#7 - Korgu Chideh Shrine

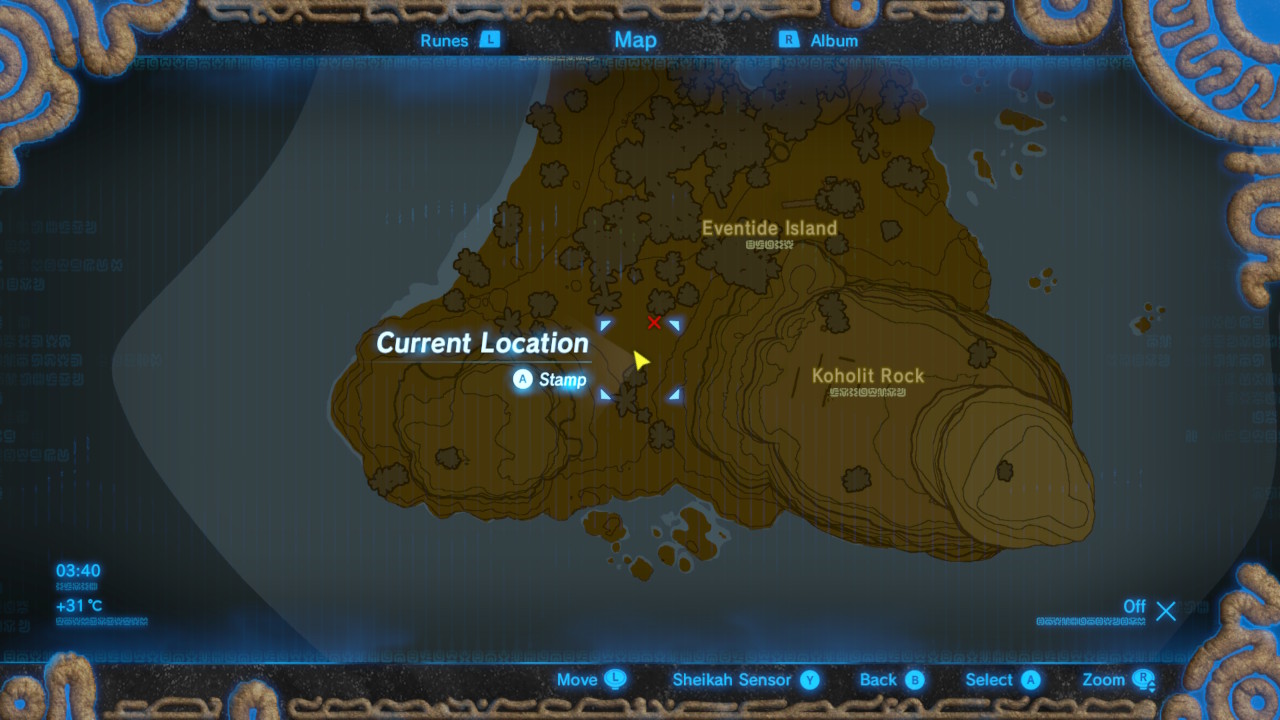
This shrine quest begins as soon as you set foot on Eventide island. You can reach the island by gliding off Cape Cales, but you'll need a lot of stamina - or elixirs - to make it there.
Alternatively, take a raft and steer yourself to the island with Korok leaf.
Stranded on Eventide can be completed by locating the three orbs on the island and getting them onto their pedestals.

The first and easiest pedestal is just off the northern tip of the island. You'll see this when you land after gliding here.

The first orb is located at a tree-house outpost guarded by Moblins.

After you take care of the enemies, take the steps to the top platform and grab the orb from next to the chest.

Take it back to the northern pedestal and use Cryonis to get it close enough so that you can lob it into place.

The second orb is in the same enemy camp as the second pedestal.
They're on the southeast side of the island.

Once you've cleared out the enemies here, move the slab off the pedestal using either Stasis or Octo balloons. Grab the orb from the nearby platform (pictured above), and pop it it on top.
The last orb can be found in the southern part of the island, between the two plateaus.

It just so happens to be round the neck of a Hinox. You should have picked up enough weapons from your last two encounters to defeat it.
If you're struggling, you can shoot the rope necklace to free the orb.

The pedestal is located on the south west plateau, but it's guarded by electric Chuchus and Bokoblins, so clear them out first.
The shine will pop up on the south east plateau. The puzzle was getting it to appear, so walk in and interact with the altar to clear it.
#8 - Tawa Jinn Shrine

Fun times lie ahead with The Three Giant Brothers shrine quest. You have to defeat three Hinox (that's the plural now). And they're not your average beasts either.

Examine the stone table on the western plateau overlooking Taran Pass to start the quest.
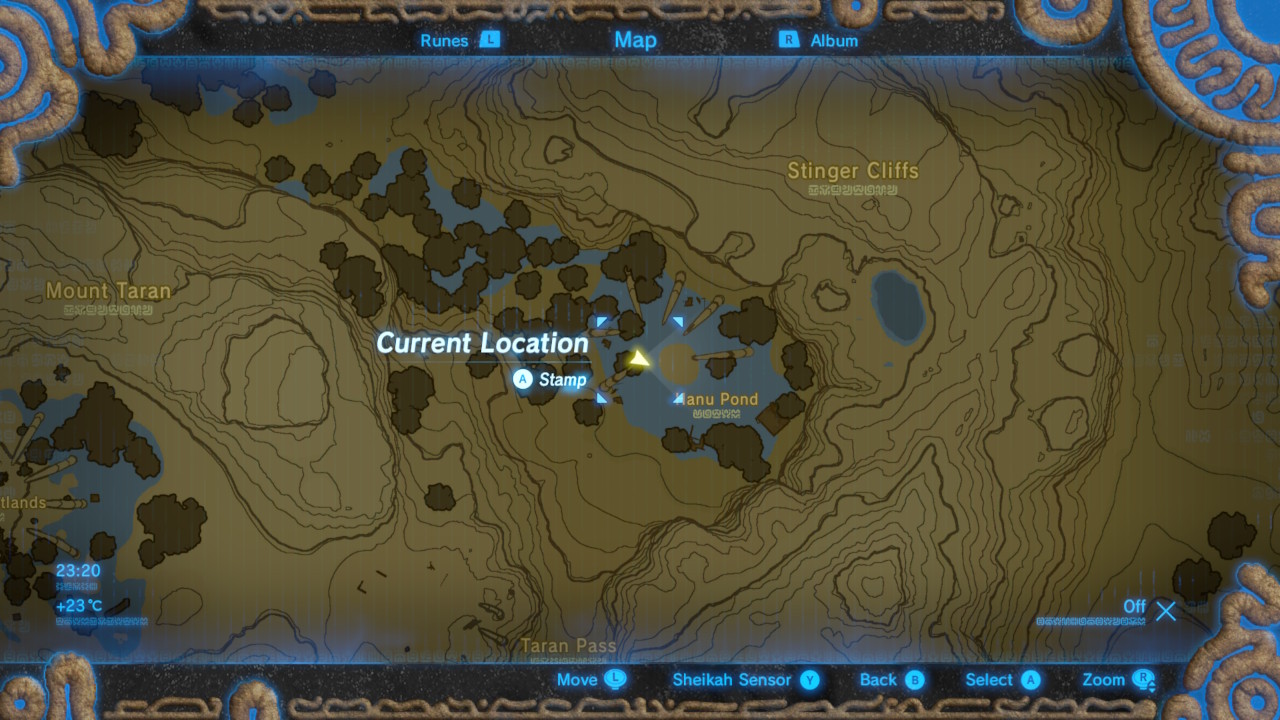
The Hinox (Youngest Kin) is hanging out in Hanu Pond, to the northeast of the pedestals.

If you have enough arrows, you can cheese the battle from the safety of the giant bones in the ground.

The Hinox (Middle Kin) is in Uten Marsh.
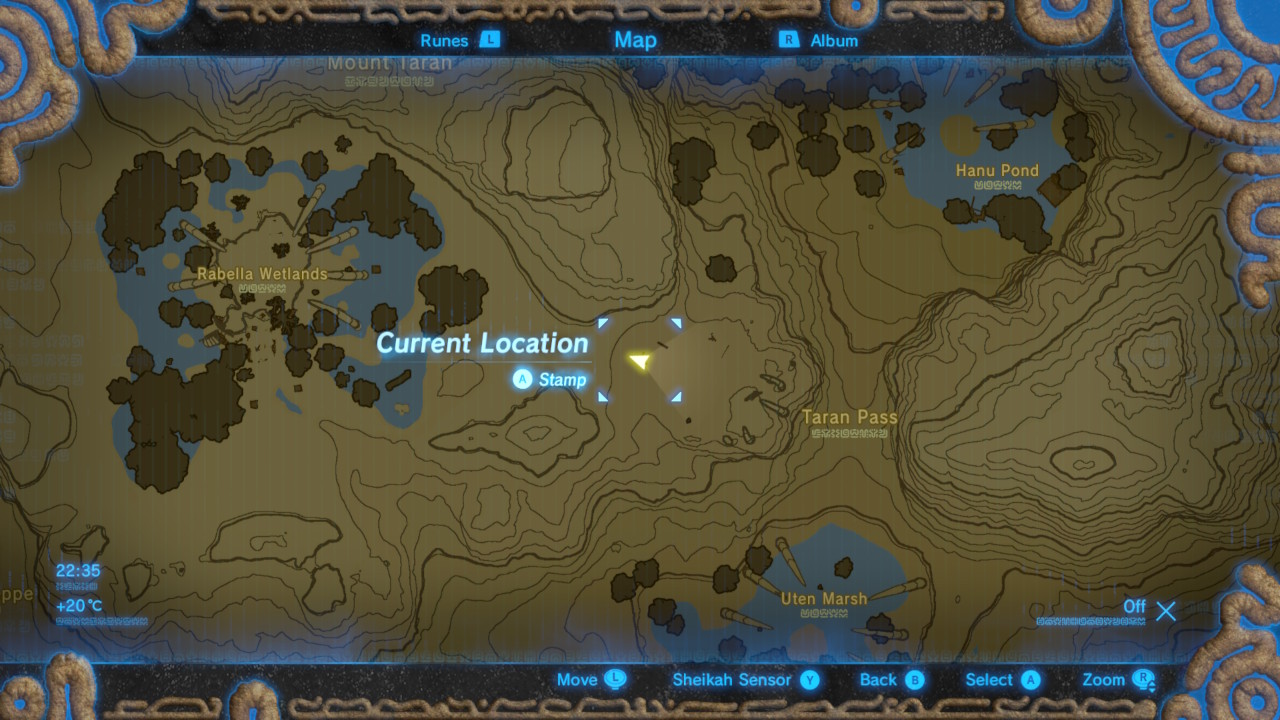
The marsh is directly to the south of Taran Pass.

The Hinox (Oldest Kin) is snoozing in Rabella Wetlands.

Rabella Wetlands is to the west of Taran Pass and the area with the stone tablet.

Place all three orbs on the pedestals to reveal the shrine, then walk in and examine the altar to clear it.