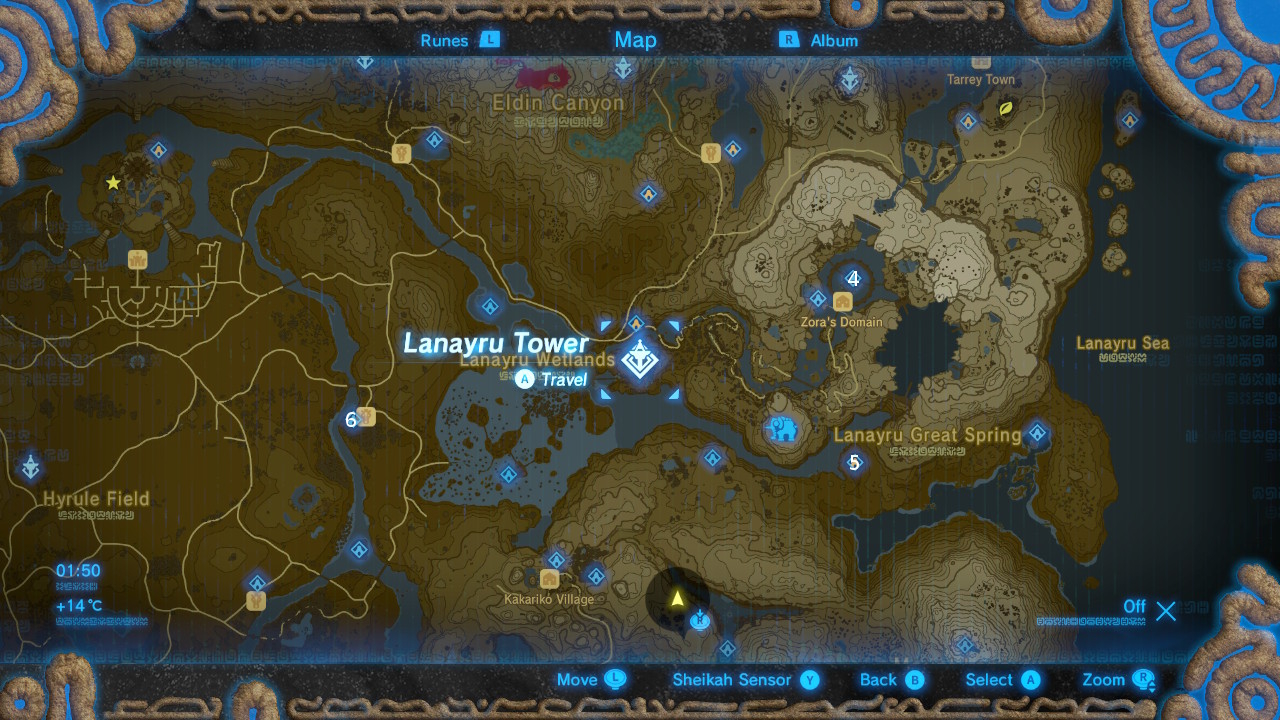
Lanayru Tower
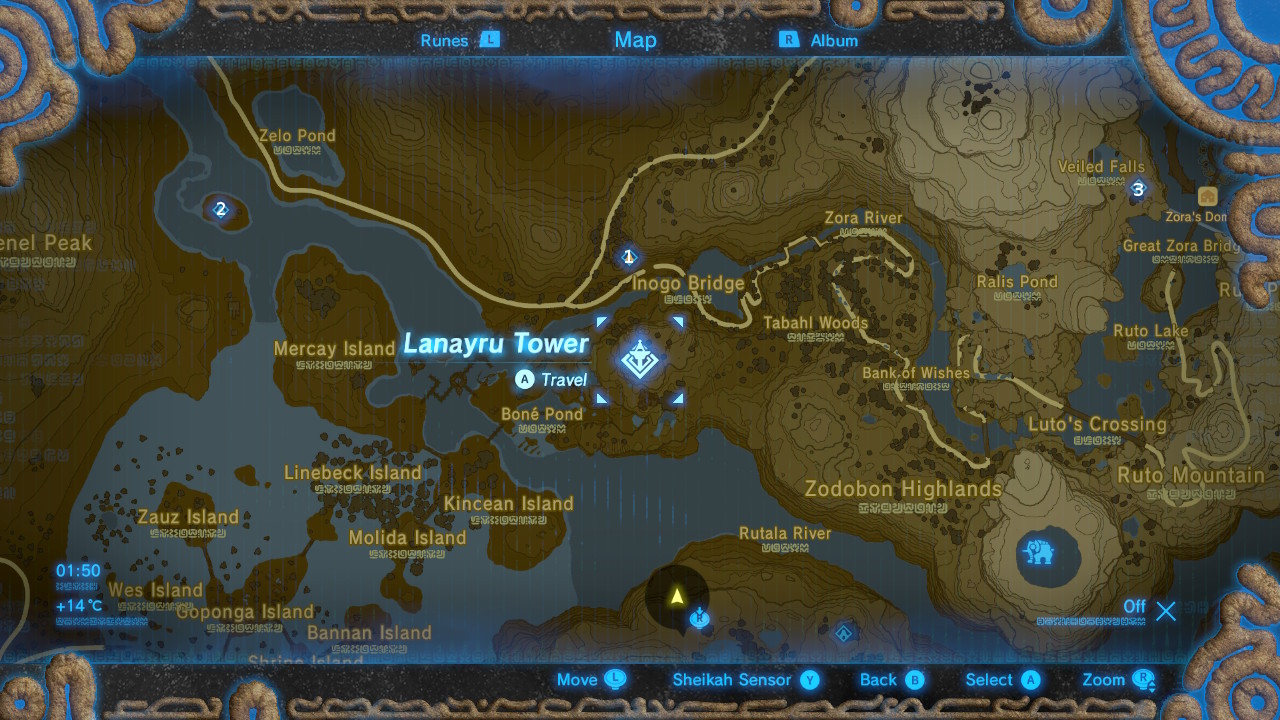
#1 - Soh Kofi Shrine
This shrine is directly to the north of Lanayru Tower, on a plateau overlooking the road that runs alongside Zora River.
Once inside, you'll have to defeat a Guardian Scout II with 375 HP who uses a single melee weapon. Look out for the spinning attack, the spinning laser attack, and the lethal charged laser attacks.
#2 - Sheh Rata Shrine
There are a bunch of brambles surrounding this shrine, which sits on a small hill on an island. You'll need to set fire to them to clear a path to the entrance.
As soon as you enter, drop down onto the ledge on the right to get the treasure chest, then head up the ramp back to the starting platform.
Use the lever to activate the crystal which will raise the water level and allow you to swim across the room and enter the next area.
Use Magnesis on the metal barrel to position it above the floor switch in the water here. Head to the first room and use Cryonis to reach the platform with the crystal on and drop a bomb next to it. This is to help us get the chest on our way out.
Now use Cryonis to reach the platform with the laser on. Shoot the crystal with an arrow from here to lower the water level, and glide back to the second room.
The water will have drained in here as well and the barrel will be on the floor switch, lifting the gate to the final area with the altar.
Walk through and you'll see a platform on the right with the last chest on. Detonate the bomb to raise the water level again and use Cryonis to summon an ice platform in the water. Climb it to get the chest, then proceed to the altar to clear the shrine.
#3 - Dagah Keek Shrine
This shrine will only appear once you've completed The Ceremonial Song shrine quest.
Once you've defeated the Divine Beast Vah Ruta, talk to Laruta - one of the kds by the fountain - to start the quest. You'll need either the Ceremonial or Lightscale trident to reveal the shrine.

Leave Zora's Domain via the west gate and make your way to the Veiled Falls, which is to the left of the bridge.

There's a pedestal in the water here. Swim up the waterfall using your Zora armour and glide down until you're at a safe distance that won't result in any fall damage.
Perform an attack in the air above it to ground pound the pedestal with your trident, revealing the shine. You can now head in and straight up to the altar.
#4 - Ne'Ez Yohma Shrine
You can't miss this shrine; it's bang in the middle of Zora's Domain.
I'm sure this shrine is all about your use of Cryonis, but why ignore the ledges that form a path straight to where the orb needs to be?

Use Stasis to knock the orb off the pedestal and along the ledge to the right of the room, as you look at the pedestal.
Once it's in the corner, use Stasis again to get it down the ramp.

Once it lands at the bottom, usher it into its final resting place with stasis again and we're done.
#5 - Rucco Maag Shrine

You'll have to circumvent the thorns surrounding the shrine to gain access, which you can do by following the path around it, or simply gliding over it from higher ground nearby.
To solve the puzzle inside, all of the torches on the large cube in the middle need to be lit. The easiest way to do this is with a couple of fire arrow. Explosive arrows will work too, as will regular arrows if you can build a bonfire to light them on.
First off, the right side of the cube has a torch poking out of it, toucing another torch. Light 'em up.
Next, look to your left and you'll see three crystals jutting out of a smaller cube. Hit the horizontal crystal to turn the central cube.
Now light up the torch on the left side of the cube to open the gate. If you want the chests on the wooden platforms, you can set the platforms on fire with fire or explosive arrows, or use Cryonis to make an ice pillar, clamber on top, and use Magnesis to get the chests down.
#6 - Kaya Wan Shrine
This shrine is right next to the Wetlands Stable.
Use Cryonis to get across the water and up to the next area.
Take care of the Guardian Scout here, then use Cryonis to lift the chest out of the water, and again to reach the next area.
Take down the two Guardian Scouts with arrows to get them out of the way. There's fast-flowing water here, and you'll need to hop onto a raft that will take you to the the waterfall before dropping down into the abyss. You can ride it to the end and glide off to the altar as you hit the falls.
If you want the chest, use Stasis or Cryonis - to freeze the raft or stop it moving forward - when you approach the gate to the left. Use Cryonis to lift up the gate and gain access to the chest.

#7 - Kah Mael Shrine
This shrine is hidden away on Tingel Island.

Look for a slab of rock on the ground. You can either bash it out of the way using Stasis, or get an Octo balloon from killing one of the many Octoroks on the island, and drop them on the slab to lift it out of the way.
Once you're inside, step onto the lower left side of the scale. Shoot the ropes holding the wooden platform in place to drop the metal cube onto the other pan. This will propel you into the air. Open the glider and float to the platform with the chest.
If you can't make the jump from there to the altar platform, drop back down to the left pan and use Magnesis to lift up the metal cube and drop it onto the scale again to get the lift you need to glide onto the altar platform.
#8 - Daka Tuss Shrine
Daka Tuss is on one of the small islands to the southwest of the tower.
Use Magnesis to move the bowl underneath an orb in the water. Lift it out and over to the fenced area. Drop the orb into place by pushing the bowl into the wall to tip it out.
Take the bowl with you to the second area. Use the bowl to fish out an orb and carefully tip it out onto the top of the cage.
Place the bowl above the floor switch and it'll sink down and press it, opening the cage ceiling, allowing the orb to drop into place.
Now that the water's drained, go back to the first room to access the chest.
When you're ready to wrap up, head to the empty pool where the bowl is sitting and go through the doorway that's now exposed to reach the altar.
#9 - Shai Yota Shrine

You'll find Kass in Horon Lagoon, and he'll start you off on the Master of the Wind shrine quest.
Basically, you need to destroy the destructible rocks around the central windy, stony area.

Three of them are easily reachable, but the fourth might pose a little tricky to reach. It's on the upper part of an arch that the wind is whistling through.
Get on the rocks close to it and drop a square bomb that won't roll off. Attach an Octo balloon to it and detonate it when it hits the rocks. You can try rolling the bomb into the water, or shooting the destructible rocks with bomb arrows as well.

Once all four blocks are destroyed, get to the highest point on the rocks (it has a bunch of small rocks scattered over it), and glide down using the wind to reach he pedestal. If you don't land on the pedestal, the shrine won't appear.
That was the main puzzle, so nip in and examine the altar to clear the shrine.
Jump to Section: