Tabantha Tower
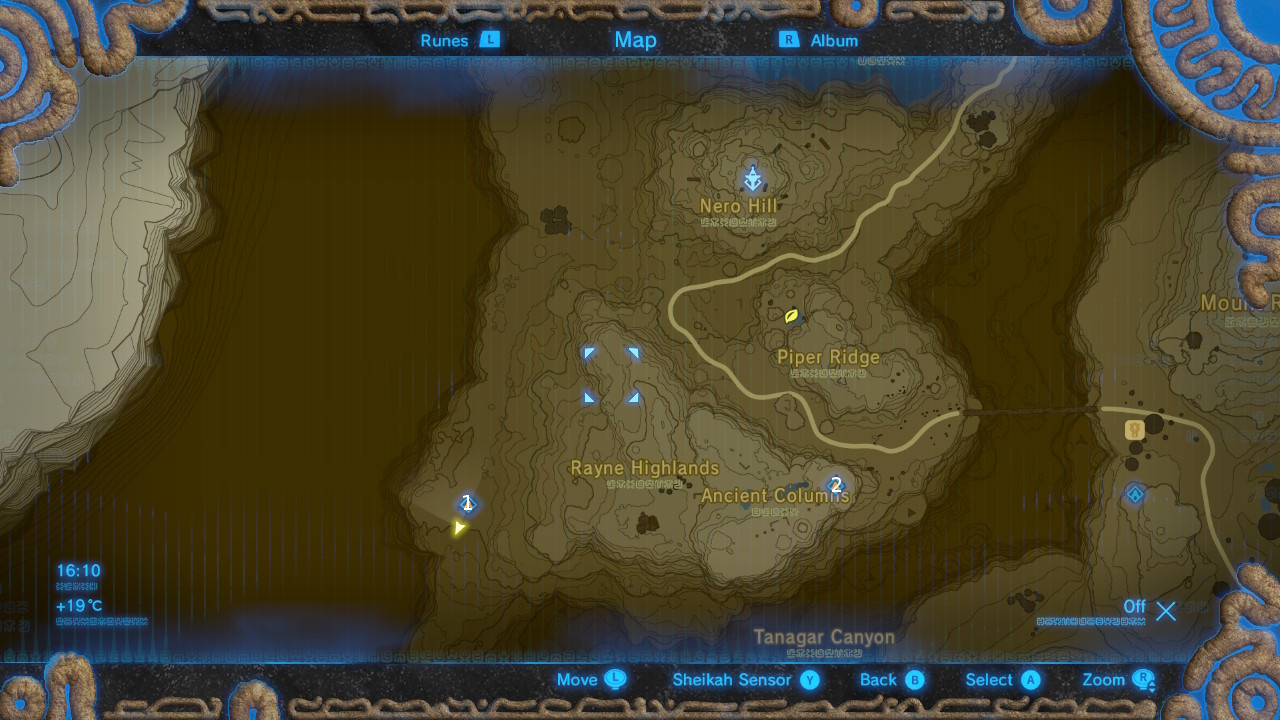
#1 - Kah Okeo Shrine

This shine is to west of the Ancient columns, which are directly south from the Tower.
Go west from the Ancient Columns and you'll be able to see an enemy outpost.

From the top level of the outpost, you'll spot a pillar to the northwest. Head over there.
At the base of the pillar, look southwest and you'll see a dark slab on the ground near the edge of the cliff.
Make your way over to it.

To access the shrine you need to move the slab out of the way, so attach a couple of Octo balloons to it, or use Stasis to whack it out of the way.
Once inside, open the chest to get a Korok Leaf and head up the ramp.
You need to get the windmill going with the Korok Leaf to open the gate, but you'll need to be quick to get through before it closes.
Ignore the bomb barrel and proceed to the next room to find three Guardian Scouts below the walkway. You'll also spot a treasure chest up to the left. Take care of the Guardian Scouts and return to the walkway via the ladder.
Use the Korok Leaf on the windmill and a platform suspended by balloons will appear. Hop on and steer into the corner where the chest is. If anything goes awry, you can use the Korok Leaf on the windmill to generate a fresh platform,
Now make your way over to the catwalk on the opposite side of the room and follow the path to the Guardian Scout at the end end. Take it down and use a bomb to destroy the destructible wall. Go on through to the next area.
Stand on the launcher and use your Korok Leaf on the windmill to activate it. Glide down to the left to get the chest, then glide from here to the topmost platform on the right side of the room.
Climb the ladder and detonate a bomb on top of the destructible rocks to reveal an updraft and ride it to the top of the pillar. Activate the windmill to make a balloon platform appear, and steer it over to the chest.
Now comes the fun part of steering your platform safely through the spikes. On the other side, go up the ramp and activate the windmill to get launched to the platform above.
Over to the right is a large destructible pillar that we need to destroy. Use a bomb arrow if you have one to hand. If not, the room on the left contains a windmill that makes explosive barrels appear. You can steer it towards the pillar and detonate it with a fire arrow, or guide it toward a torch so that it detonates by itself.
Direction rather than speed it more important here, if your arsenal of fire and explosive arrows has run dry.
Now activate the launcher with the windmill and glide into the newly revealed updraft. Ride it to the top to find a chest.
Climb down the ladder and glide off the small platform to the walkway on the other side of the room. Glide down from there to the ledge down to the left where a final chest is sitting, then drop down to open the door to the altar.
#2 - Tena Ko'Sah Shrine

This shrine is at the east end of the Ancient Columns, south of Tabantha Tower.
There's a Guardian Scout IV inside with 3000HP and three '++' weapons.
#3 - Bareeda Naag Shrine

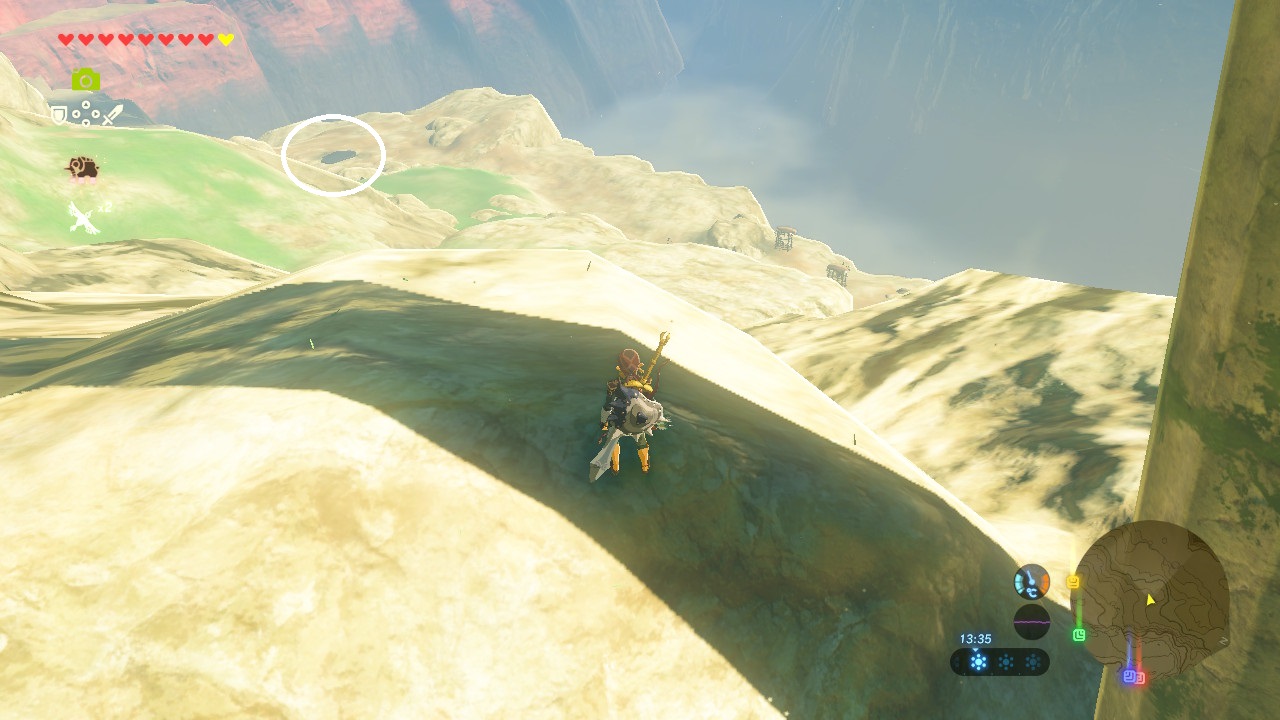
To get clues as to how to reveal this shrine, talk to Bedoli at Revali's Landing in Rito Village after you've defeated Divine Beast Van Medoh. For an additional hint, talk to Laissa.
You can actually reveal this shrine before you take on the Divine Beast, and you'll still get the shrine quest from Bedoli afterwards. It'll complete immediately.
The pedestal she's referring to is south of Revali's Landing. You can see it on the left in the picture above.

You need to be on the pedestal at 12:40, when it starts glowing. Activate it with fire - a fire arrow to the centre works wonders - and the shrine will appear.
Inside, scooch up the ladder to the top of the cannon and drop a round bomb into the pipe. Detonate it when it's rolled into position to reveal a target. Drop another bomb into it and detonate it so that the orb misses the obstructive panels and hits the target, opening the gate to the right.
Destroy the destructible wall to the left of the canon to get the chest before heading through the gate.
Go past the altar and into the next room to find another canon. This time the target is moving as well, but yo don't have to hit it dead on centre. Shooting it with the orb will open the gate to the second chest.
Now head back to the altar to clear the shrine.
#4 - Akh Va'Quot Shrine
This shrine is in Rito Village. Just follow the steps until you see it.
Once inside head up the stairs to the right to a room with three chests.
To get the first one, shoot an arrow at the crystal to raise the gate. Use Cryonis to reach the other two, located in the alcoves on the right of the room.
Back in the main area you have to get the fans into the correct positions. With the side of the room closest to the entrance being the front, and the side closest to the altar being the back, hit the front left and back left crystals three times each.
Hit all of the other crystals once. You can now reach the altar.
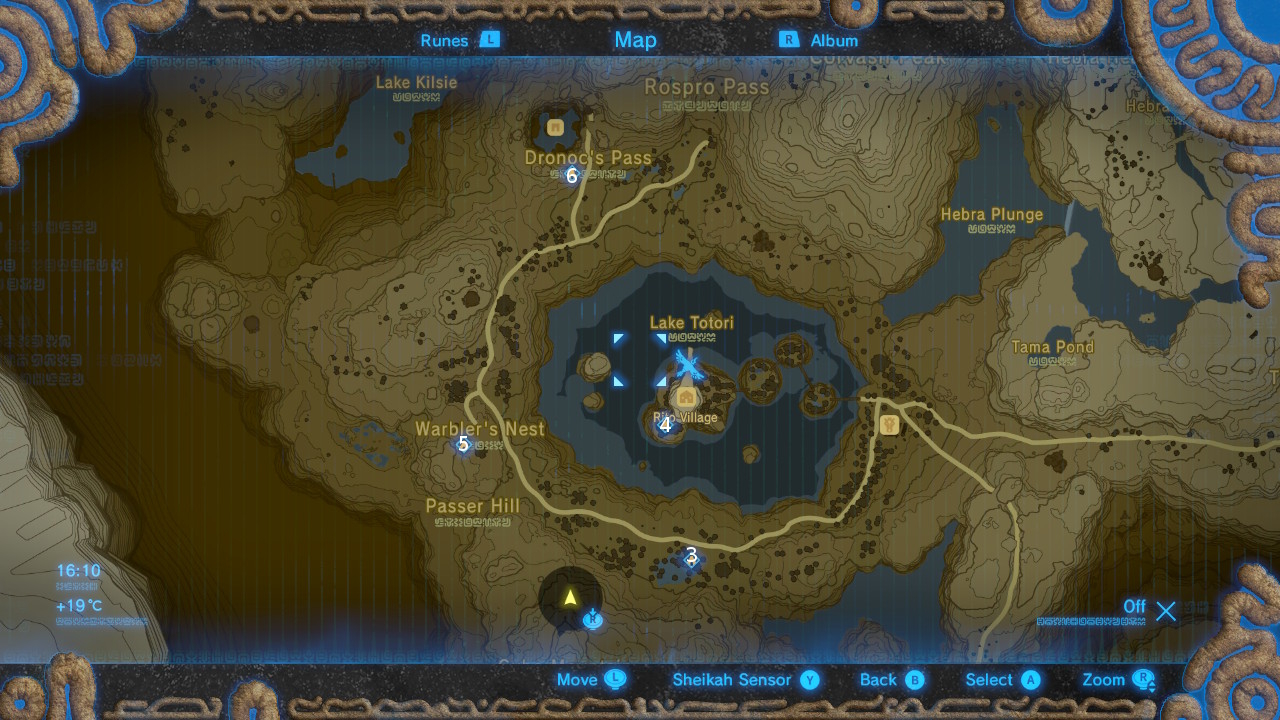
#5 - Voo Lota Shrine

After defeating Divine Beast Van Medoh, talk to Amali next to the shrine in Rito Village to start the Find Kheel side quest. Take care of this side quest by heading to Warbler's Nest, west of the village.
Kheel wants you to round up here sisters for their recital, beginning the shrine quest Recital at Warbler's Nest.
Head back to Rito Village, and don't forget to check in with Amali to complete the Find Kheel side quest.

You can find Cree in the general store who will give you the goat butter needed for the salmon meunière.

Kotts is fishing in the pond just outside of the entrance to Rito Village and will give you a hearty salmon for the recipe.

Scale the central pillar in the village to find Notts on a ledge overlooking the shrine. She'll give you the final ingredient.

Head to the cooking pot in the village, cook up the salmon meunière and hand it over to Genli.

Return to Warbler's Nest to find all five sisters next to five rocks. Talk to Kheel to get a Korok Leaf and listen to their song. You'll notice the notes are different colours.
Stand on the pedestal and use the Korok Leaf to send a gust of wind through the holes in the rocks to mimic the tune. The notes created are also colour coded, so you can figure it out fairly easily.
If you won't want to spend the time doing that, you'll notice that each rock has spikes at the top, ranging from one to five.
Glow wind through them in the following order: 4, 5, 3, 1, 2.
Enter the shrine and climb the super tall ladder. A gate will close behind you and you'll be trapped next to the crystal. As soon as you hit it, you'll be dropped into the main area, so glide forward to reach the platform ahead with the locked gate. Be wary of the sideways gust as you get closer to it.
If you were successful, you'll have avoided a lava bath.
Use the gust to reach the left platform and ride the upwards gust at the other end to reach the upper level. Ride the gusts up here, taking care not get impaled on the spikes, and you'll land next to a chest with a small key inside.
Glide down to the next platform and head up the ramp. You can glide down to the second chest and return to glide over to the platform with the locked gate.
Use the key to reach the altar.
#6 - Sha Warvo Shrine
This shrine is out in the open, just off the road that leads to the Flight Range.
Ride the updraft to the first platform. Ride the second to the platform on the left where you'll find a Guardian Scout and a chest. Use the same updraft to reach the platform on the right.
Use the next updraft to reach the ladder.
Open your paraglider on the updraft up here and glide around to the left of the pillar to find an opening you can land in, as well as yet another updraft.
At the top of this on, rotate the camera to get eyes on the chest and glide on over.
Now glide back to the platform at the top of the ladder, repeat the process to reach the final updraft, and glide over to the altar.