Halo: Reach Multiplayer Map Guide
We break down Halo: Reach's multiplayer with strategies for every map
Suggested Ability: Active Camouflage

Schwarzenegger won’t know what hit him
With its twisting ramps, wide corridors, and multiple levels, Reflection’s layout can make using your motion tracker unreliable. Flip on active camo when you are unsure of what’s around the corner or when you spot an opponent before they see you. It’s also handy to use when moving across the map’s wide open center.
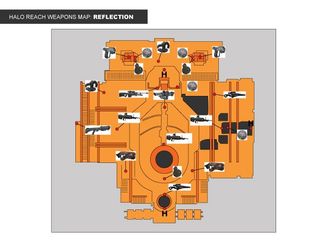
Major Weapon Locations

The sniper rifle is on the high balcony. Take the central elevator to the top floor or use a jetpack to reach this area quickly.
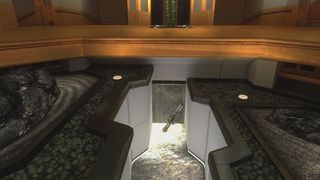
The rocket launcher is smack dab in the middle of the Zen gardens. Scope the area before dropping down or risk landing in a prime grenade trap.

The sword is sitting in the koi ponds, just across the hallway that leads to the elevator.
Health Locations
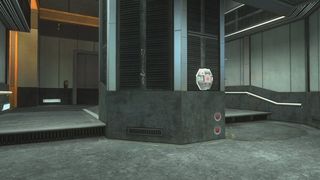
Right behind the elevator shaft in the low hall

At the entrance, between the two doors
Map Tips
•The air elevators and the back rooms make for excellent ambush points or holdout areas. Just make sure not to stay long after your presence is known or you risk someone chucking a grenade in the room to keep you company.

•In the air vent room (lowest level) foes from above cannot throw grenades down at you and will have difficulty lining up any kind of effective shot. The single entrance gives you a good vantage point.

The pistol/alcohol combination on this table suggests a very Zen game of Russian Roulette is about to happen
•Hiding out in these back rooms will allow you to ambush players that are using the high-traffic hallways.
•Active camo plus sword is a lethal combination. It’s also a good idea to turn on active camo before you make a break for the koi pond where the sword rests.
•You can use active camo to give yourself time to line up that perfect sniper shot from just about anywhere. Just don’t camp where the sniper rifle spawns. Even if you are invisible, this is a high traffic area and you’ll likely be assassinated by someone looking for the rifle.
Sign up to the GamesRadar+ Newsletter
Weekly digests, tales from the communities you love, and more
