Dragon Age: Origins walkthrough
Stuck? We'll get you to the Archdemon in no time flat
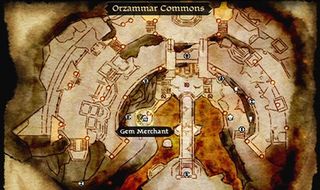
NEW AREA: Orzammar Commons
There are lots of quests to take and people to see here. Take up some sidequests if you like, or head to the Diamond Quarter to continue.
KEY ITEM: Cute Nug
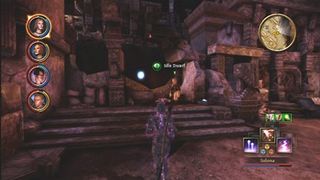
If you’re hoping to woo Leliana, one of your first stops should be the Dust Town. An Idle Dwarf is a little ways down the road. Talk to Leliana first, who will tell you she wants a Nug as a pet. After this conversation, a new conversation option will appear for the Idle Dwarf. Just leave Dust Town and talk to him again to receive a cute Nug.
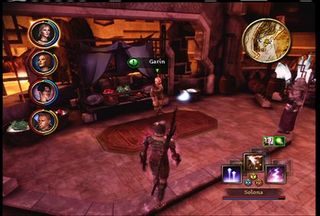
At Garin’s shop, you can find a Golden Mirror that will trigger a conversation with Morrigan, a Gold Amulet that she will also love, and a Gemmed Bracelet that anyone will like.
NEW AREA: Diamond Quarter
Harrowmont’s Estate has some chests, quests and a codex update, but your destination is the Chamber of the Assembly. Here, things get tricky. You’ll have to side with either Prince Bhelen or Lord Harrowmont to continue. To side with Bhelen, talk to Vartag in the Chamber of the Assembly and accept his quest. Or, to side with Lord Harrowmont, talk to Dulin right outside the Chamber and accept his quest instead.


Our guide will cover both options, starting with Harrowmont, then Bhelen.
Siding with HARROWMONT
Talk to Dulin to enter the Proving Grounds under Harrowmont’s name. You’ll need to convince the two warriors Baizyl and Gwiddon to fight in the Proving. Baizyl waits on the left side. Persuade or Intimidate him to find out more about his relationship. He’ll tell you to see Myaja, whose locked quarters are in the same building to the south.
Gwiddon is in the northern room. Either Intimidate or Persuade him to goad him into a fight. Now that that’s taken care of, talk with the Proving Master. You’ll have to face some easy baddies as part of your Proving, which shouldn’t be a big problem. You’ll get to choose a partner for the fourth battle. Baizyl or Gwiddon can fight with you, and they aren’t too shabby. Return to Dulin at the Tapsters Tavern after you win to meet Lord Harrowmont.
Siding with BHELEN
Talking to Vartag will start a simple quest. You’ll need to deliver some documents to Lady Dace and Lord Helmi. Lady Dace is in the Diamond Quarter near House Harrowmont. She’ll give you a map to the Aeducan Thaig, found in the Deep Roads. Before venturing there, first go to Tapster’s Tavern and talk to Lord Helmi. He’s a lot easier to convince. Once you’re ready, go to the Deep Roads, accessible through the Commons.
NEW AREA: Aeducan Thaig
There’s not much here other than some simple corridors, a few minor gems, and a bunch of Darkspawn. Lord Dace is north. Head back to the Chamber of the Assembly and speak to Vartag, who will take you to Bhelen.
Entering Jarvia’s Hideout
Regardless of whom you’ve sided with, you’re going to have to take out Jarvia. You’ll be ambushed on your way there, but it shouldn’t be a problem. Alimar’s Emporium holds your next clue. Enter the Slums house and get ready to fight. Persuade or Intimidate the thug to get a Finger Bone Token and use it on the Suspicious Door outside.
NEW AREA: Cartel Hideout
Defeat the gang of thugs. There are a number of chests and crates in this area, but be wary of the trip wire in the southern portion of the map. After you loot the two barrels in this corridor, take a left at the fork. You can fight a guard who drops a key. Free the prisoner and continue.
Note that there are a number of stashes around here. You’ll only be able to open Jammer’s Stash Box if you only take the least expensive trinket from all the other stashes. A Longrunner’s Cap is your reward for your trouble. Jarvia is waiting in the upper right corner of the map, but the path leading to where she’s hiding crisscrosses plenty.
BOSS: Jarvia
If you can sleep or stun the archers from afar, this battle will be much easier. There are numerous traps to be found if you choose to chase Jarvia, and unfortunately the door locks behind you, preventing an easy funnel. You’ll get plenty of good gear for finishing her off.
Once you’re done, loot all you can find and head back to the Diamond Quarter to meet whomever you sided with (House Harrowmont for Lord Harrowmont, Orzammar Royal Palace for Bhelen). You’ll have to enter the Deep Roads again, but this time you’ll have help.

RECRUIT: Oghren
He’ll join you to help find Branka.
NEW AREA: Cardin’s Cross
Expect lots of battles and another Ogre encounter. This can be kind of tough. Cast an area spell as soon as possible for crowd control. Either way, heal often and bust your way through!
A chest carries a Totem, near where you fight the 2 Broncos. Sten will like it.
NEW AREA: Ortan Thaig
You’ll see an Ogre fighting some spiders. If you can hit them all with an area spell, you’ll get XP for killing them all. There are plenty more spiders to go around if you miss the opportunity, though.
You’ll find Ruck near the area where you fought the Golem. He’s near the Darkspawn corpse. Several spiders will spawn behind you after you talk to him, but you can trade with him soon afterwards if you track him down. Head over the bridge and be ready to fight two more Stone Golems. After that, the Spiders won’t want to fight you anymore until you reach the…
MINIBOSS: Corrupted Spider Queen
The Spider Queen keeps her distance and will occasionally encase you in a web before teleporting away and summoning more spiders. Fire spells will work reasonably well, but this battle is mostly an endurance test. Collect Branka’s Journal and head to the Dead Trenches next.
NEW AREA: The Dead Trenches
You’ll run into a group of Legionnaires. They’ll be of great help, but remember to heal them. You’ll fight a slew of archers and another Ogre across the bridge. Make sure all the baddies are being dealt with simultaneously, or you’ll be in trouble. Work your way through the Trenches, being mindful of the traps along the way.
MINIBOSS: Darkspawn Horde
Expect to encounter a huge group of enemies here. If you’ve got the fireball spell, use it often, along with Tempest or Blizzard. These spells take up a lot of Mana, but you’ll need them for crowd control in this fight. As always, keep an eye on your party’s health, and let them come to you.
Prepare yourself for a Shriek ambush, and then keep heading north. There’s some Armor of the Legion in a Sarcophagus near where you fight the Emissary. As you continue on, you’ll start hearing strange voices. Heading north when you hear about the “seventh day” will send you into another battle with some Corrupted Spiders and some decent loot.
Past where you speak with Hespith is an Ominous Door. You can’t open it yet, so head past it to the Legionnaire Shrine. Touch the Legion of the Dead Relic to update your codex and the Legionnaire Altar to get the key to the Ominous Door. The Spirits will turn on you, so be ready!

BOSS: Broodmother
First things first, you’re going to want to take down the Broodmother’s tentacles. Once they’re gone, you can attack her without too much of a problem. Area spells like Fireball, Tempest, and Blizzard work well. Be careful for the Darkspawn she summons, too. With the Broodmother gone, head to the Anvil of the Void. Branka is waiting.
Sign up to the GamesRadar+ Newsletter
Weekly digests, tales from the communities you love, and more

The ESA says its members won't support the one form of game preservation that might actually work

Avengers directors compare Millie Bobby Brown to Tom Holland as they tease her "fantastic" performance in new graphic novel adaptation which reunites them with Endgame team

MTG Cowboy Bebop cards aren't Japan-exclusive after all, but you may still struggle to get them