Boletarian Palace 1-1 walkthrough - Gates of Boletaria
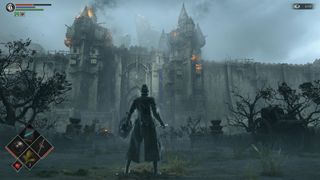
As soon as you start, you’ll be in front of a massive structure and your goal is to open up the large gate ahead. Of course, you can’t simply walk up to it and expect it to open. Head forward up the stairs and then make a left. Keep going, past the giant hole in the ground and back inside.
You’ll eventually end up outside with some steps ahead of you. To the right of the steps are some hidden firebombs that you absolutely must pick up for the boss fight later on. Try not to use them until the boss battle. Go upstairs, through the fog door and continue making your way upward. Your aim is to make your way all the way to the top. Just be careful of the boulder that rolls down the stone steps towards the end.
Skip the fog wall on the left for now and go straight, making your way down a long series of steps. About halfway down is a platform that leads outside. Slash the two chains here and head down to the bottom to open up a shortcut. Don’t forget to pick up (and equip) the Cling Ring, which grants you more health while in souls form. Then go all the way back upstairs and head through the fog.
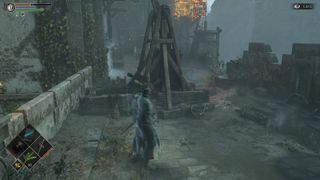
Follow this path down, past an enemy by some barrels, and you’ll come to a fork. (Keep in mind, you can roll off the steps here onto the platform below to save an NPC named Ostrava and grab the Thief’s Ring behind him.) To the right is a merchant and straight ahead is the path to advance. Keep going forward and you’ll see more steps ahead that lead upward (if you go down the steps to the right, you’ll encounter Ostrava who you can save from the Dreglings.)
Keep going up and cross through another fog gate. Slash the wood holding up the boulders to your left to take out the multiple enemies ahead and keep going until you reach a bridge. Run ahead, grab the enemies’ attention, and then back away so the Red Dragon moves past. Keep doing this until it’s clear and then pull the lever on the other side of the bridge. This will open up the main gate at the start of the level.
After that you’ll reach another set of stairs that leads all the way down to the ground level. Be careful as you make your way down and take note of the Hoplites on the steps, which are slimy shielded creatures. Attack them from behind and when you reach the bottom, pull the lever. This will open up a shortcut that leads to the large gate ahead of where you started. Cross the fog to start your first real boss fight.
Phalanx boss fight
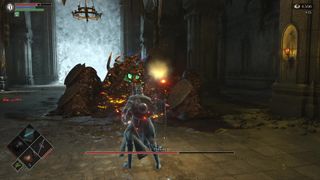
This is an unusual boss in that much of the fight involves you taking out the smaller Hoplites enemies around it. They’re all gathered on top of the boss and prevent you from attacking it. Remember those firebombs we advised you to save? Use them now. Throw all of them at the Hoplites until most of them are cleared. Once they’re all dead, you’ll have a clear shot of the boss.
At this point, either use your magic or two-hand a melee weapon to ensure you deal lots of damage. The boss itself isn’t dangerous at all, but those smaller enemies pack a punch. If you die, you won’t get your firebombs back, so do your best to take out the boss on your first go.
After it’s dead, interact with the Archstone to head back to The Nexus to level up. You’ll need to head upstairs to talk with The Monumental located towards the top of The Nexus. Then talk with The Maiden In Black to level up. Once you’re ready, go back to the Archstone and head to Phalanx Archstone for the next part.
(We also recommend grabbing the Crescent Falchion+1 sword from the beginning of Shrine of Storms, known as 4-1, because it's the first level of the fourth archstone. It’s found just past the first fog gate, immediately to the left through the building and back outside behind a Dual-Katana Black Skeleton. This weapon scales with magic and will give you a leg up in the earlier segments.)
Phalanx Archstone 1-2 walkthrough - The Lord’s Path
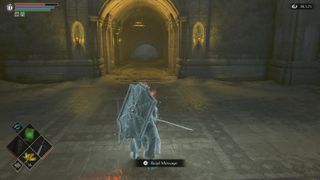
Section 1-2 is actually fairly straightforward in terms of the path you need to take to reach the boss. In essence you need to cross the large bridge ahead. But that’s easier said than done, of course. From the start, make your way through the room with the Hoplites and head outside.
Before you cross, we should warn you about the Red Dragon that patrols the bridge here. The dragon flies laps across each section of the bridge, so what you need to do is run as soon as he flies past. It also helps if you take off all your armor, as you’ll be lighter on your feet. Don’t stop to pick up any items unless the dragon has just flown by.
Run to the area ahead and make your way downstairs to the underground portion of the bridge. What you need to do here is follow the hall forward until you reach a pathway on your right that leads up to the next section. Along the way are dogs and a few enemies, so take them out cautiously. At the very end of this section, just after the path that leads upstairs is a merchant.
Once you’re back upstairs on the main floor of the bridge, turn around and take out the group of four archers that will start shooting at your back. Then, go upstairs to grab the Compound Short Bow, and then make your way through the fog.
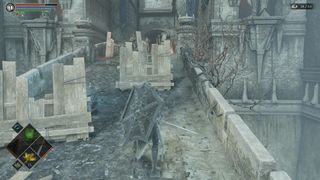
After you do, take out the enemies ahead and then wait just behind the carriage. As soon as the Red Dragon flies past, run. Stick to the right side of the bridge and stop when you get to the wagon with the barrels in it. Wait here until the dragon passes, and then run all the way back to the carriage. With a little luck, the dragon will have taken out at least some of the enemies ahead -since they’ll chase after you across the bridge.
Keep doing this until you’re comfortable, then make your way towards the path forward. Head upstairs to grab items (and find Crystal Gekko that will drop weapon upgrades if you can catch it before it runs away so attack from range if you can) and take note of the locked door nearby (you’ll need the Iron Ring of Keys you can pick up later to open it). When you’re ready, make your way through the fog to start the next boss fight.
Tower Knight boss
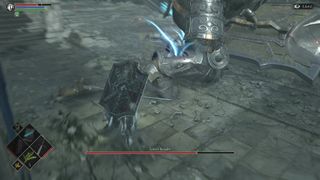
The Tower Knight boss is massive and packs a serious punch, but he’s not as difficult as he looks. The main thing you need to do before engaging with the boss is to take out all the archers that surround the arena. Head up the steps on either side and wrap around to take them all out while steering clear of the Tower Knight’s long range attacks.
Once they’re all dead, run down to the boss and lure him to the center of the stage. Make sure you two-hand your melee weapon and don’t lock on. Stick behind him and strike both of his ankles until they both emit a blue substance.
Keep doing this and the boss will fall on its back. Make sure you step away so he doesn’t fall on you. Then, pummel away at his head to deal massive amounts of damage. Repeat this process a couple times (depending on the weapon you have) until the boss is dead.
Head back to the Nexus to level up.
Before proceeding any further through 1-3, you must first slay an Archdemon (the final boss of a world), so we advise to skip over to the second world, Stonefang Tunnel next. We’ll come back to 1-3 at the end of the game.
Jump to Section:
- Demon's Souls walkthrough: Tutorial
- Demon's Souls walkthrough: Boletarian Palace (part 1)
- Demon's Souls walkthrough: Stonefang Tunnel
- Demon's Souls walkthrough: Tower of Latria
- Demon's Souls walkthrough: Shrine of Storms
- Demon's Souls walkthrough: Valley of Defilement
- Demon's Souls walkthrough: Boletarian Palace (part 2) and End Game

