Dark Souls Remastered full walkthrough guide: every area, boss, secret and more
Survival tips for Dark Souls Remastered - how to beat the game from start to finish
Dark Souls Remastered: UNDEAD BURG PART 2
Above: Fighting Havel the Rock early (optional)
OPTIONAL: If you have the Master Key, you can open the wooden door inside the tall tower and descend. On the bottom floor you’ll encounter a fierce enemy named Havel the Rock. This fight is extremely difficult at this stage in the game, but the reward, Havel’s Ring, is worth the early attempt, for it raises your maximum equipment load by 50%. The least risky strategy we know is staying extremely close to him (essentially touching) while circling to his left. After he smashes his hammer down, line up a backstab. We suggest coming back after grabbing the Drake Sword, which we’ll get to very soon, to shorten the fight.
If you get hit while guarding, immediately roll to avoid a second attack. One unguarded hit from Havel will kill you at this point in the game, so be prepared for a long battle with a very short and tragic ending if you aren’t steady and patient. You can also parry and riposte his attacks if you can read them correctly, but it’s far riskier.
Finally, you can simply leave out the door he was guarding and enter the Darkroot Basin. Havel cannot pass beyond this door, so feel free to coax him into the doorway and have at him with whatever spell or weapon you can think of. It’s a bit cheap, but hey, we won’t judge you.
BOSS: TAURUS DEMON
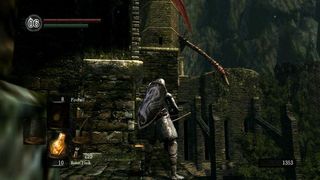
Pass through the fog door at the top of the tower. At the moment, you are safe. Turn to your right, climb the ladder, and kill the two petty enemies you find up top. Descend the ladder and walk forward until the demon appears, then immediately sprint to the ladder behind you and climb it. Quickly (or he’ll getchya!) run off the ledge and press RB to do a plunging attack for big damage. It’s the best way to start this battle.
Now it’s time to use Fireball (if you’re a Pyromancer), Firebombs, and Black Firebombs. You should have plenty of the latter two at this point, and the Taurus Demon is very weak to fire. Simply back away and throw flames. If he gets to close, roll underneath or around him. Note that Firebombs have better range, speed, and damage radius than Fireball.

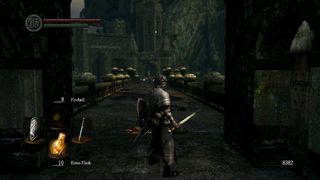
After the battle, continue on until you reach a very long bridge on which several undead soldiers are standing. Before heading onto the bridge, turn around and go down the stairs to meet Solaire of Astora. It is important that you repeatedly speak to him now and say yes when the options arise. He’ll give you the White Sign Soapstone. This item allows you to leave summon signs for other players, who can then call upon you to help them fight in their worlds.
Now go back to the bridge. Sprint as fast as you can across it, sticking to the right side and avoiding the enemies. The Hellkite Dragon will appear as you run, spraying flames everywhere. Your goal is the staircase leading down found at the bridge’s halfway point. You will likely get hit by the flames at least once, but you will survive.
OPTIONAL BOSS: HELLKITE DRAGON
Run up the stairs and onto the bridge for just a moment then run back downstairs. The dragon will scorch the enemies. Wait a few seconds for the dragon to perch, then sprint. Wait for the dragon to come down, and as soon as it does, rush and attack its left foot with your weapon in both hands.
If the dragon leaps into the air, stay next to the support column. The flames won’t hit you. If the dragon starts turning around, run back downstairs, wait for it to perch again, and repeat! As you can see, we only took negligible damage when the dragon landed. We were never hit by fire or his attacks. The same will work for you.
At the bottom of the stairs, you’ll see two doors. Head through the larger one and descend more stairs until you reach a ladder. Kick it down. You now have a shortcut between the bridge and the bonfire! Rest up at the fire then revisit the Undead Merchant to buy a bow and some arrows if you haven’t already.

Use the ladder near the bonfire to return to the room underneath the dragon’s bridge. Now head through the smaller of the two doors to emerge on the bridge’s lower level. Take out the two undead soldiers here, then walk to the right edge of the bridge. You should see the Hellkite Dragon’s taildangling in the distance. Use your bow and wooden arrows and shoot the tail until it falls off. (It takes about 20 wooden arrows to destroy the tail.) Once you’ve done that, the immensely powerful Drake Sword will appear in your inventory. Consider backtracking at this point and using the Drake Sword to defeat Havel.
Continue along the lower level of the bridge into a room with three rats. Rats poison you after a few consecutive hits, so be very careful despite the creatures’ low health. Climb the nearby ladder to enter the Undead Parish.
Jump to Section
- Firelink Shrine
- Undead Burg part 1
- Undead Parish part 1
- Undead Parish part 2 (First Bell)
- (OP) Grinding for Souls & Finding Goodies in Darkroot Garden
- Lower Undead Burg
- (OP) Returning to the Undead Asylum
- The Depths
- Blighttown
- (OP) Exploring Blighttown's Swamp
- (OP) Undead Dragon & Valley of the Drakes
- Quelaag's Domain (Second Bell)
- (OP) Moonlight Butterfly & the Divine Ember
- (OP) Darkroot Basin, the Hydra, and Dusk
- Sen's Fortress part 1
- Sen's Fortress part 2
- Anor Londo part 1
- (OP) Painted World of Ariamis part 1
- (OP) Painted World of Ariamis part 2
- Anor Londo part 2
- Return to Firelink Shrine & Placing the Lordvessel
- Sif and the Darkroot Garden
- New Londo Ruins
- The Catacombs
- Tomb of the Giants part 1
- Tomb of the Giants part 2
- (OP) Dark Sun Gwyndolin & the Blade of the Darkmoon Covenant
- Duke's Archives
- Crystal Cave
- Demon Ruins part 1
- Demon Ruins part 2
- (OP) Great Hollow & Ash Lake
- Lost Izalith
- (OP) Sanctuary Garden (New Content)
- (OP) Oolacile Sanctuary & Royal Wood (New Content)
- (OP) Oolacile Township (New Content)
- (OP) Chasm of the Abyss (New Content)
- (OP) Black Dragon Kalameet (New Content)
- Kiln of the First Flame & Gwyn, Lord of Cinder
Current page: Dark Souls: Undead Burg Part 2
Prev Page Dark Souls: Undead Burg Part 1 Next Page Dark Souls: Undead Parish Part 1Sign up to the GamesRadar+ Newsletter
Weekly digests, tales from the communities you love, and more

I'm GamesRadar's Managing Editor for guides, which means I run GamesRadar's guides and tips content. I also write reviews, previews and features, largely about horror, action adventure, FPS and open world games. I previously worked on Kotaku, and the Official PlayStation Magazine and website.

Diablo 4 dev is sending 666 buckets of literal bugs to "meat their maker" at a charity for hungry birds

The cult vampire third-person shooter that nearly bankrupted the small studio that made it is getting a film adaptation from the Transformers producer

Fallout mod site says it's like players are downloading Skyrim "twice every second" after Amazon TV series drives fans back to the open-world RPGs