Dark Souls Remastered full walkthrough: OOLACILE TOWNSHIP (OPTIONAL)
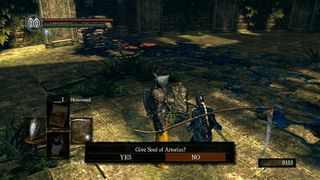
Before going any further, return to the room in which you fought Artorias. You’ll find a small NPC named Ciaran. She’ll ask you for Artorias’ soul. If you say yes, she’ll give you two great dexterity weapons, the Gold Tracer and the Dark Silver Tracer. HOWEVER, if you kill her instead, you get both weapons and her Lord’s Blade Armor set. Since she is not a merchant and only appears once per playthrough (if you leave she disappears for good), we highly recommend you kill her.
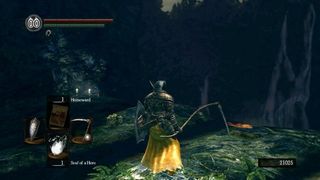
We also suggest you go back to the bridge outside Artorias’ fog door into the Royal Wood and take the descending path into the valley below (seen above). Follow the valley until the end (seen above), where you’ll see Kalameet fly by. You must witness this to trigger a conversation dialog later. DO NOT descend the nearby ladder into Kalameet’s lair, as you cannot yet defeat him.
Now, finally, go back and simply descend through Oolacile Township. You’ll encounter many Bloatheads and fewer Bloated Sorcerers. Be very wary of the Dark Orb spells that the sorcerers cast. These spells are fast and incredibly damaging.
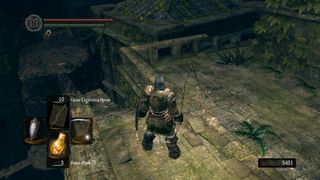
When you reach the point pictured above, elect to go right and roll off the ledge where the railing is broken. You’ll land on a wooden walkway. Follow the walkway across to the adjacent building. Head down the stairs along the side and go into the structure. Take out the sorcerer inside, then go down a level.
This lower room contains two sorcerers, who together pose an extreme threat. Carefully take them out one by one, then pillage the chest they were guarding for your very own Dark Orb Spell. From that chest, go back up the stairs and take the door at the top outside and around the corner. You’ll find another sorcerer. Kill it to obtain the I’m sorry Carving.
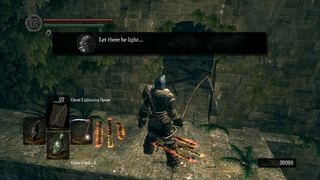
Climb all the way back up the stairs and leave the building via the door through which you did not enter. Cross the short stone bridge and turn right. Around the corner you’ll see an Orange Sign that says “Let there be light” (seen above). Shine light at the wall (Skull Lantern, Sunlight Maggot, Cast Light) and it will vanish. Inside this room you’ll find a chest containing a Silver Pendant. This item is infinitely reusable and can be used to block the Dark Orb spell.From this room, you can leap across to the blue roof and head up the spiral stairs to the top of the tower.
The chest at the top of the tower is a Mimic. Kill it for the Very Good! Carving. You can also reach this chest by taking the normal route from the bonfire. Now descend all the way down the tower and continue deeper into the township.
As you cross the narrow stone bridge, be careful of the sorcerer on the other side, who can easily knock you down with his orbs. Now is a great time to test the Silver Pendant. Eventually, you will enter a large building and descend into a wide open room full of Bloatheads. Clear it out, then look for the corpse hanging from the ceiling. You can shoot it down with an arrow (or cut it down later) and loot it for the Dark Fog Spell.
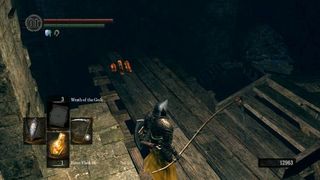
Instead of heading through the door nearest that corpse, go back and proceed through the door at the bottom of the staircase. Follow this path until you reach the point pictured above. Where you see the orange sign in the screenshot, roll down and into the room with a fireplace. To the right of that fireplace is a Mimic who drops the Crest Key.
Now go back to that door that was near the hanging corpse. This leads outside and across a fallen building. If you enter the building on the right, you’ll find an elevator leading back to the bonfire. Left takes you further into the level. For now, let’s go back to the bonfire and take care of some optional business.
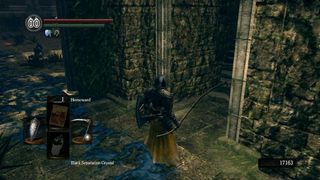
Head back towards the room where you fought Artorias. In the hallway leading to it, you’ll notice a path on your right with some stairs leading up (seen above). Take this path to a locked door which can be opened with the Crest Key. Climb the ladder to find Hawkeye Gough, an NPC merchant. Talk to him until he starts repeating himself, then 'leave" and talk to him again. He’ll ask you about Kalameet. Answer yes to both his questions. He will then rise and fire an arrow at Kalameet, grounding the dragon. You can skip ahead to the Kalameet section now if you wish, or take the shortcut elevator back down to Oolacile Township, which is what we’re doing now.
From the bottom of the shortcut elevator, proceed forward and across the bridge. We recommend taking out the sorcerers from afar with a bow as opposed to within range of their Orb attack. Just past them, you’ll encounter a Chained Prisoner. His melee attacks are strong, and you should be wary of his swinging ball and chain, but any sort of ranged attack can make short work of this guy. Continue on down an elevator and to another bonfire.
Jump to Section
- Firelink Shrine
- Undead Burg part 1
- Undead Burg part 2
- Undead Parish part 1
- Undead Parish part 2 (First Bell)
- (OP) Grinding for Souls & Finding Goodies in Darkroot Garden
- Lower Undead Burg
- (OP) Returning to the Undead Asylum
- The Depths
- Blighttown
- (OP) Exploring Blighttown's Swamp
- (OP) Undead Dragon & Valley of the Drakes
- Quelaag's Domain (Second Bell)
- (OP) Moonlight Butterfly & the Divine Ember
- (OP) Darkroot Basin, the Hydra, and Dusk
- Sen's Fortress part 1
- Sen's Fortress part 2
- Anor Londo part 1
- (OP) Painted World of Ariamis part 1
- (OP) Painted World of Ariamis part 2
- Anor Londo part 2
- Return to Firelink Shrine & Placing the Lordvessel
- Sif and the Darkroot Garden
- New Londo Ruins
- The Catacombs
- Tomb of the Giants part 1
- Tomb of the Giants part 2
- (OP) Dark Sun Gwyndolin & the Blade of the Darkmoon Covenant
- Duke's Archives
- Crystal Cave
- Demon Ruins part 1
- Demon Ruins part 2
- (OP) Great Hollow & Ash Lake
- Lost Izalith
- (OP) Sanctuary Garden (New Content)
- (OP) Oolacile Sanctuary & Royal Wood (New Content)
- (OP) Chasm of the Abyss (New Content)
- (OP) Black Dragon Kalameet (New Content)
- Kiln of the First Flame & Gwyn, Lord of Cinder

