Dark Souls Remastered full walkthrough: ANOR LONDO PART 2
Use the giant elevator platform to connect to the bridge leading to Anor Londo’s largest building. Climb the massive staircase to find two Giant Knights. Try to lure one out at a time. Head right and be ready to take on two Bat Wing Demons. These enemies have a chance of dropping the Demon’s Spear one of the most valuable weapons in the game at this point.
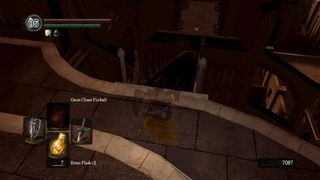
After taking out the demons, look for a long buttress with guardrails leading down and to the left. We suggest equipping the Ring of Fog (a reward from the Forest Covenant) if you have it to avoid being shot at by the archers in the distance. Once you reach the bottom of the buttress, be ready to take on three more Bat Wing Demons.
Step onto the nearby bench and ascend the next buttress. If you do not have the Ring of Fog, be very careful as you move around the edge of the column as archers will be firing massive arrows at you. One hit could knock you off the edge, so move quickly as opposed to blocking.
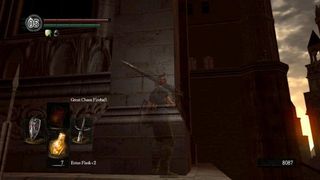
Once on the other side of the column, not even the Ring of Fog can protect you. Run up the final buttress at full speed, then turn right. Roll to avoid the knight’s arrows as you move towards him, then take him out, preferably with Pyromancy, magic, or miracles. Continue along this ledge until you can drop down in front of a fog door. Head on through.
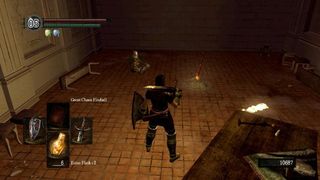
You’re now inside the main structure. Go through the first door on your left to find a bonfire and Solaire sitting next to it. Talk to him, then rest up. The room opposite this one contains a Silver Knight and a chest containing 3 Sunlight Medals.
Run through the main hall past the spiral stairs. Take out the Silver Knight then enter the door to your left. Strike the fireplace to reveal a passage. At the bottom of the secret room you’ll find many chests. The one on the left is a Mimic. The Mimic drops an Occult Club. The other chests contain a Dragon’s Tooth and Havel’s Armor Set.
Return to the spiral staircase and head up. On the next level, in the corners, you’ll find two more Mimics. One drops and Silver Coin and the other a Gold Coin.
Back in the main hall, face the Archer standing in a distant doorway. Enter the room on your left and proceed through and up the stairs. You’re now on the roof. First, head into the tower opposite the one from which you just exited.
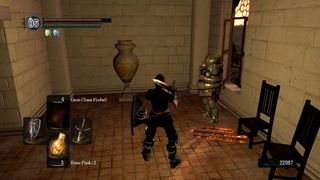
Descend the stairs to find Siegmeyer of Catarina. Talk to him three times, then proceed through the nearby door and deal with the knights, one of which is directly, to your right as you enter the room. Once you kill them, talk to Siegmeyer to receive a Tiny Being’s Ring. Exit through the door in the room where you fought the three knights. This unlocks it. You can use this chance to return to the bonfire.
Head back up to the roof and go through the central doorway, the one that was guarded by an archer. Take the spiral staircase all the way down. You’ll have three paths to choose from. The door on the left leads to a small room containing a Titanite Demon (a tough battle in such cramped quarters). The door on the right leads down to the locked door across from the bonfire (as well as chests containing a Silver Knight Armor set), opening up a shortcut. Do what you will on the right and the left, ten head straight up the stairs.
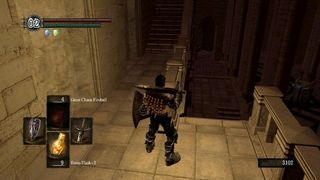
You’ll now be in a great hall. Take the stairs on the left, which lead up. You’ll notice that one of the windows in this next area is broken. Go through it, then follow the ledge until you can drop down to the visible loot (which is a Dragonslayer Greatbow and Dragonslayer Arrow). Drop through the gap in the bars nearby (preferably while also performing a plunging attack on the Bat Wing Demon below). Defeat the other demon, then turn around and open up the black gate. You now have a shortcut back to the Lady of Darkling’s bonfire.
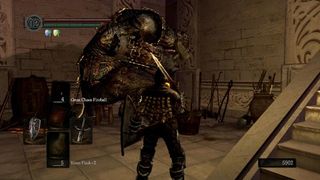
Instead of going through that gate, however, turn around and enter the building to find the Giant Blacksmith. Squeeze behind him to find a chest containing a Hawk Ring. Head up the nearby stairs to return to the great hall.
As you descend to the ground level, you’ll get a message on screen saying the Black Eye Orb is quivering. You can use it to enter Knight Lautrec’s world as a phantom and kill him.
OPTIONAL: BOSS – KNIGHT LAUTREC
This is an easy battle. You need only take out Lautrec and you’ll be teleported home. Begin by using magic/Pyromancy/miracles, then, if necessary, attack these enemies like any other humanoid enemies (parry/riposte or backstab). Victory grants you Anastacia’s Soul, which allows you to revive the Firelink Shrine Fire Keeper and thus rekindle the bonfire there. You also get a Souvenir of Reprisal, 5 Humanity, and a Ring of Favor and Protection (boosts HP, stamina, and load, but breaks when removed)
On the ground level of the great hall, you’ll encounter two Giant Knights. These are stronger than the normal Giant Knights, so try to avoid them if you can. On one end of the hall you can push a lever to open the main doors, creating yet another shortcut. At the other end of the hall is the fog door leading to the boss.
We highly recommend you are in human form and summon at least Solaire to help you with the upcoming boss fight, as it is arguably the most difficult in the game. Solaire’s summon sign is on the right-hand steps if you’re entering the great hall from the main door.
BOSS – ORNSTEIN AND SMOUGH
Note the armor of whichever boss you kill last will become available for sale by the merchant under the aqueduct near Firelink Shrine.
It is imperative that you pick one boss and focus on killing him first, because once one dies, the other gains full health as well as enhanced abilities.
Smough is slow and easy to dodge/outrun. As such, it is easier to leave him in the distance while you fight Ornstein. Make heavy use of Pyromancy when he stops moving. Once it is down to just Smough, wait for his hammer to whiff then get a good two or three hits with your favorite weapon in both hands.
Again, summoning Solaire is highly recommended – more so now than for any other battle. He serves as a much needed distraction.
After the battle, look for an elevator in either far left or far right corner of the room. Before you proceed through the door on the second level, check the perimeter of the room for the Armor of Favor set. Light the bonfire and proceed through the double doors to meet Gwynevere. Kneel before her and she will give you the Lordvessel. If you talk to her again, you can also enter her covenant, the Princess’s Guard.
Jump to Section
- Firelink Shrine
- Undead Burg part 1
- Undead Burg part 2
- Undead Parish part 1
- Undead Parish part 2 (First Bell)
- (OP) Grinding for Souls & Finding Goodies in Darkroot Garden
- Lower Undead Burg
- (OP) Returning to the Undead Asylum
- The Depths
- Blighttown
- (OP) Exploring Blighttown's Swamp
- (OP) Undead Dragon & Valley of the Drakes
- Quelaag's Domain (Second Bell)
- (OP) Moonlight Butterfly & the Divine Ember
- (OP) Darkroot Basin, the Hydra, and Dusk
- Sen's Fortress part 1
- Sen's Fortress part 2
- Anor Londo part 1
- (OP) Painted World of Ariamis part 1
- (OP) Painted World of Ariamis part 2
- Return to Firelink Shrine & Placing the Lordvessel
- Sif and the Darkroot Garden
- New Londo Ruins
- The Catacombs
- Tomb of the Giants part 1
- Tomb of the Giants part 2
- (OP) Dark Sun Gwyndolin & the Blade of the Darkmoon Covenant
- Duke's Archives
- Crystal Cave
- Demon Ruins part 1
- Demon Ruins part 2
- (OP) Great Hollow & Ash Lake
- Lost Izalith
- (OP) Sanctuary Garden (New Content)
- (OP) Oolacile Sanctuary & Royal Wood (New Content)
- (OP) Oolacile Township (New Content)
- (OP) Chasm of the Abyss (New Content)
- (OP) Black Dragon Kalameet (New Content)
- Kiln of the First Flame & Gwyn, Lord of Cinder

