Oblivion main quest walkthrough
The steps to become the Champion of Cyrodiil, from beginning to end.
Bruma Gate
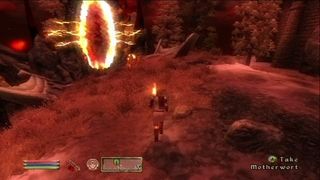
Once you have finished up with Martin, head outside and talk with Jauffre. He will tell you that there is an Oblivion gate opened at Bruma and he wants you to go help them close it. Make your way there and speak to Burd just outside the gate. Speak to him and then wait for him to deliver his speech to his men. Once he is done, lead him and the two others into the gate and fight all the demons along the way to the Fury Spike. Go to the right to the Rending Halls and follow the path upwards to the Blood Fountain. Use it after you clear out the room and continue to the door leading to the Citadel Hall door. Follow the next corridor to the end and make a left through the door there.
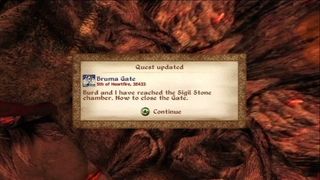
Head up the next ramp and go through the door to the Corridor of Dark Salvation and continue going up the ramps until you eventually come to the door leading to the Sigillum Sanguis. Kill the enemy in front of the door and take the key from his body to get through the door. Once inside simply follow the ramps up to the sigil stone, defeating the enemies along the way. Once you have it closed, you will be teleported back outside and will need to talk to Burd once again. He will tell you to return to Cloud Ruler Temple and inform Jauffre of your success.
Allies for Bruma
Once you have told Jauffre of your success at Bruma with Burd and the Oblivion gate, he will then ask you to visit all the other cities and ask for aid. You don’t have to do this right now, but you will eventually, so might as well get it out of the way. The Oblivion Gates you will close are all basically the same as the few you’ve closed already. Some will require you to enter through random cave passages however. There’s no real trick to any of the gates, and it’s just a long and arduous process to go through. It is voluntary and you don’t need to do it, however, later on in the main story quest, you’ll be glad that you did for the addition support that the troops give you.
Anvil: When you arrive in Anvil, talk to Countess Millona Umbranox and she will not offer help until the Oblivion gate is closed. Close it by going through the random caves to reach the spire and then close the gate just like the previous ones. Once you have, talk to her again and she will pledge support.
Bravil: Once you arrive at the castle, talk to Count Regulus Terentius and like Anvil, you will need to close the Oblivion gate before they will offer help. After you close it, return to the Count and he will then be willing to offer help.
Cheydinhal: Talk to Count Andel Indarys, and just like the previous two, you will need to close the gate first before he pledges support troops.
Chorrol: Talk to Countess Arriana Valga when you arrive at the castle and just like everyone else, you will need to close an Oblivion Gate before they will promise support to you. Once you close it, return to the Countess and speak with her.
Imperial City: Speak with High Chancellor Ocato and you will have to close….no wait! He will tell you that he has no soldiers to send. Huzzah! No Oblivion gate!
Leyawiin: Talk to Marius Caro and he will want you to close the Oblivion gate. Just like all the rest, work your way to the top of the tower and activate the stone to shut it down. Nothing tricky about it.
Skingrad: Talk to Mercator Hosidus and he will run and fetch Janus Hassildor for you to talk about the aid. When he arrives, he will tell you that he can’t spare men because…go on, guess. That’s right! There’s an Oblivion gate outside his city! Close the Oblivion Gate and then return to speak with the aid and he will go and fetch Mercator who will then offer some troops.
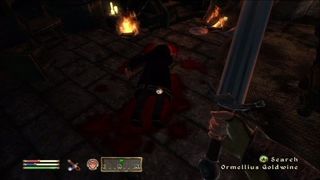
Kvatch: Talk to Savlian Matius in the chapel and you will then need to complete the quest “Battle for Kvatch” if you haven’t already. If you haven’t, once you talk to Savlian, you will need to head back to the chapel to get the gate house key. Follow the underground passage and prepare for a large battle. Once through there, you will come back outside and fight a few more scamps. Continue to the trap door that leads to the gatehouse passage and follow the fiery corridor to the next hatch. Once you go up it, at the far side will be the gate controls. Operate it and Savlian and his men will rush through the doorway to fight the swarm of enemies on the other side.
Clear them out and you will then need to enter the castle to look for the count. Inside will be a few more scamps and fire demons. When you clear those out, Savlian will tell you to go on ahead and look for the count. Enter the far back room and you will find his body along with a couple more Scamps to deal with. Examine the body and take the ring back to Savlian. Once you do, the quest will be over, as well as the Allies for Bruma quest.
Blood of the Divines

Make your way to the Cloud Ruler Temple and talk to Martin. He will tell you that the next item you need is the blood of the gods, but to get it, you need to talk to Jauffre. So make your way to Jauffre’s location and he will tell you that you need to recover the armor of Tiber Septim in Sancre Tor. Make your way to the ruins and when you arrive, you will get attacked by some skeletons. Once you dispatch them, enter the large doors and make your way through the corridor. Make sure you have a silver weapon or a magical weapon on you so that you can deal with the ghosts that roam the passages. Once you reach the iron bars, use the lever on the right to open it and continue to the stairs. Make your way up them and you will come to an Undead Blade. Defeat him and then talk to the ghost of Rielus who will appear. He will tell you that he and his three companions have been trapped in the catacombs for a very long time and wish to complete their duty.
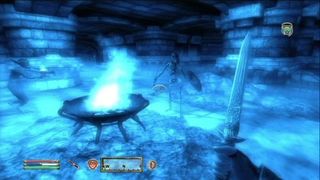
After the conversation, head across the bridge and continue to the next door. Enter the large Entry Hall and you will see that there are numerous passages along the top walkway. Go to the left and enter the door that leads to the Sancre Tor Prison. Follow the corridor and you will come to a barred gate. Use the lever on the right to open it and then almost immediately after you will run into Warden Kastav. Thankfully he’s not that tough, so take him down and then search his body for his key and take his silver mace if you need it. Use the key on the door to the right and then follow the corridor to the second intersection of passages.
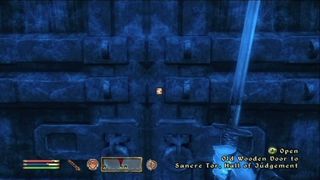
Make a right there and follow it to the last corridor on the left. Continue to the first on the left and enter the large room there with a set of stairs. The Undead Blade will be roaming around this area, so when you see him, take him down and then feel free to take his sword and shield for good measure. Once you talk to him, make your way back out of the prison and back into the Entry Hall. Next up, make your way through the door to the Sancre Tor Hall of Judgment.
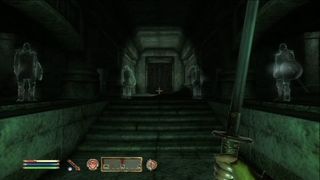
Follow the corridor to the right and you will eventually come to the Undead Blade after fighting through a swarm of ghosts. Defeat the Blade and you will free the ghost of Casnar who will tell of the other Blades. Once you are done, go back to the entrance and take the left path—where you took the right to find Casnar. This will lead to a door that takes you to the catacombs. As soon as you enter, the final Undead Blade will be at the bottom of the stairs. Defeat him and then you can finally return to the main entry hall and proceed down the center stairs and go through the door at the bottom. As you enter, the 4 spirits will dispel the evil blocking the path and you can now make your way to the end of the corridor to pick up the armor there. Once you have it, make your way back out of the ruins and return to Cloud Ruler Temple and talk to Martin.
Miscarcand
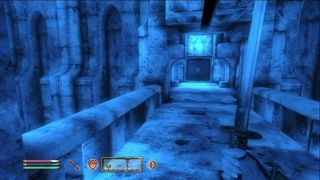
Now that you have returned the armor to Martin, he will tell you that they need a Welkynd Stone and that is can only be found in Miscarcand. Make your way there and enter the stone doors to get in to it. Once in, watch for the battles between goblins and undead and don’t approach until the battles have stopped. Once you are going through the corridors, you will come to a pathway above a large room that is blocked by a metal gate. Back track up the steps just before the path and there will be a square stone block on the wall to press. Do so and it will open the metal gate, allowing you to go through the door with a tree on it leading to Sel Vanua. Once inside there, wait for another battle to end and then press the stone on the left side wall to open the cage in the center of the room, allowing you to grab the Varla stone (a stone that when used will recharge all of your magic equipment). Once you have it go to the next large room and again allow the enemies to fight. Once clear, go into the passage on the Southeast side to find another block on the wall to press.
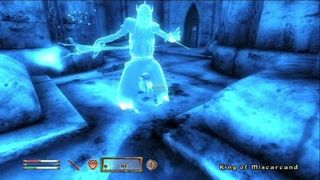
Do so and the door at the far north side will be accessible to Morimath. Once you enter here, go to the center of the large room on the raised walkway and you will find the Great Weklynd Stone. Take and get ready for a nasty fight. A lich, The King of Miscarand, and his two zombie guards will show up before you can escape. The zombies are easily taken care of, but the Lich can be a little difficult. The best way to avoid his shock attack which, chances are will kill you in one to two hits, is to keep the center area, where the Weklynd stone was, in between the two of you. Pelt him with arrows and keep moving. His attack won’t hit you if you use the center for cover and you can whittle away at his life at the same time. Once he drops, loot his body and take his staff. His staff is very powerful and will come in handy later on as you go through Paradise. Make your way to the north along the upper walkway and a doorway will open to the west. Follow it around and eventually you will come to another doorway that will open, allowing you to exit the Miscarand. Once you are back outside, safe and sound, head to the Cloud Ruler Temple once again to speak with Martin.
Sign up to the GamesRadar+ Newsletter
Weekly digests, tales from the communities you love, and more
Jeff McAllister is a freelance journalist who has contributed to GamesRadar+ over the years. You'll typically find his byline associated with deep-dive guides that are designed to help you scoop up collectibles and find hidden treasures in some of the biggest action and RPG games out there. Be sure to give Jeff a thanks in the comments while you're completing all of those tricky Achievements and Trophies.

Diablo 4 dev is sending 666 buckets of literal bugs to "meat their maker" at a charity for hungry birds

The cult vampire third-person shooter that nearly bankrupted the small studio that made it is getting a film adaptation from the Transformers producer

Fallout mod site says it's like players are downloading Skyrim "twice every second" after Amazon TV series drives fans back to the open-world RPGs