Dark Souls Remastered full walkthrough guide: every area, boss, secret and more
Survival tips for Dark Souls Remastered - how to beat the game from start to finish
Dark Souls Remastered full walkthrough: SEN'S FORTRESS PART 2

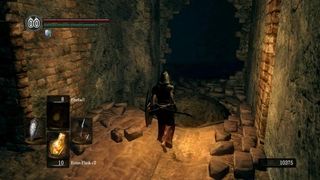
Return to the boulder control room. Point the boulder trap so that it rolls boulders down the winding staircase you’re so familiar with. After several boulders have been released, push the lever and follow the path you just had the boulders take. They will have stacked up in the hole at the bottom of the stairs to create a platform and broken through the nearby wall. Pass through this hole to find the Covetous Gold Serpent Ring, which boosts your item discovery by 200.
Return to the boulder control room. Look for a small doorway in this room that leads to a long narrow hall with a floor trap. Step on the trap then step back, letting all four of the arrow traps empty before proceeding.
You’ll soon come upon a narrow bridge with lots of swinging axe traps. Unlike previous similar traps, your best bet is to sprint through here. Once you’re on the other side, be wary of an enemy on your right (down the hall) and your left (up the stairs). Clear the area then head up the stairs.
You’ll now be at another narrow bridge with swinging axes, but watch out for a Serpent Mage that will start shooting at you as soon as you step onto the bridge. You can sprint across, but it’s best to use magic or Pyromancy to deal with the mage first. Cross the bridge, go up the stairs to your right, and pass through the fog door.

Turn right and take the stairs. Take this path down all the way until you reach a treasure chest containing a Flame Stoneplate Ring. Return to the fog door heading left and up the stairs this time. You’ll notice a section of the railing on your right is missing (pictured above). Drop down here to find a much-needed bonfire. Rest there and return to this location.
OPTIONAL: As you proceed, you’ll notice a path leading to a massive Tower Shield Knight. There’s not much room to maneuver here, making this a potentially very difficult fight (though a few Great Chaos Fireballs will do the trick). Try to keep a distance and use magic or Pyromancy, or just try and squeeze around him and hit him after he swings his massive mace.
Descend the ladder nearby and start up the tower ahead. You’ll run into Ricard on the steps, who is a hostile NPC. Defeat him for Ricard’s Rapier. In the room at the top of the tower, you’ll see two chests. One contains a Divine Blessing and the other a Rare Ring of Sacrifice.

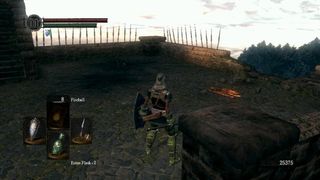
Once you return to where you killed the Tower Shield Knight, you’ll want to continue up. There is a Giant high above throwing massive firebombs down at you. There are long intervals in between, so move quickly. If you need to catch your breath, wait on a set of stairs (here you cannot be hit). If you stand in the spot seen in the picture above, you can kill the Giant with arrows and he will not retaliate.
Once you step out onto the long narrow walkways, you’ll notice a tower to your left. You can leap over the gap (remember: sprint then tap B) and enter. Here you’ll find the Crestfallen Merchant and, more importantly, a Cage Key in a chest on the lower level. Jump back across the gap, continue forward, and turn right.

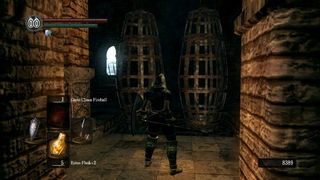
The two cages in front of you can be unlocked and used to return to the entrance to Sen’s Fortress. This is a very important shortcut. Ride the cage elevator down once to ensure its activation. In fact, if you aren’t in human form and don’t have any Humanity, now is good time to get some (farm some rats or visit the merchant in the aqueduct). Whenever you’re ready, return to the top of the cage elevator.
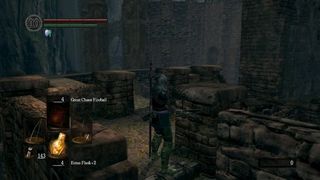
OPTIONAL: If you return to the gap in the bridge leading to the Crestfallen Merchant’s tower, you’ll notice a Giant on a lower level to your right. You can kill him from here with arrows, or jump from the small protrusion pictured above and engage him in melee combat (we suggest the former).
When you make your leap, make sure to land on the edge of the wall, as pictured above. You’ll now want to drop to your left. Down here you’ll find a Sniper Crossbow.
From the cage elevator, continue up the tower, around the narrow walkways, and up to the armored archer. Before you head through the fog door to fight the Iron Golem boss, go right and into the nearby tower. If you’re human, you’ll notice Knight Tarkus’ summon sign. By all means, use it!
BOSS: IRON GOLEM
If you have spells or Pyromancy, this fight is no sweat. Simply get close enough to coax a swing out of the golem, then pelt it with ranged attacks. Alternatively, roll underneath it when it attacks and get in a few melee blows before retreating and repeating.
If Knight Tarkus is with you, there’s a good chance he will put the Iron Golem in a stagger state. At this point, run up to your enemy and give him everything you have! He won’t be able to hurt you until he stands up again, and by then you should have already killed him.
Touch the floating ring of light to travel to Anor Londo.
Jump to Section
- Firelink Shrine
- Undead Burg part 1
- Undead Burg part 2
- Undead Parish part 1
- Undead Parish part 2 (First Bell)
- (OP) Grinding for Souls & Finding Goodies in Darkroot Garden
- Lower Undead Burg
- (OP) Returning to the Undead Asylum
- The Depths
- Blighttown
- (OP) Exploring Blighttown's Swamp
- (OP) Undead Dragon & Valley of the Drakes
- Quelaag's Domain (Second Bell)
- (OP) Moonlight Butterfly & the Divine Ember
- (OP) Darkroot Basin, the Hydra, and Dusk
- Sen's Fortress part 1
- Anor Londo part 1
- (OP) Painted World of Ariamis part 1
- (OP) Painted World of Ariamis part 2
- Anor Londo part 2
- Return to Firelink Shrine & Placing the Lordvessel
- Sif and the Darkroot Garden
- New Londo Ruins
- The Catacombs
- Tomb of the Giants part 1
- Tomb of the Giants part 2
- (OP) Dark Sun Gwyndolin & the Blade of the Darkmoon Covenant
- Duke's Archives
- Crystal Cave
- Demon Ruins part 1
- Demon Ruins part 2
- (OP) Great Hollow & Ash Lake
- Lost Izalith
- (OP) Sanctuary Garden (New Content)
- (OP) Oolacile Sanctuary & Royal Wood (New Content)
- (OP) Oolacile Township (New Content)
- (OP) Chasm of the Abyss (New Content)
- (OP) Black Dragon Kalameet (New Content)
- Kiln of the First Flame & Gwyn, Lord of Cinder
Current page: Dark Souls: Sen's Fortress Part 2
Prev Page Dark Souls: Sen's Fortress Part 1 Next Page Dark Souls: Anor Londo Part 1Sign up to the GamesRadar+ Newsletter
Weekly digests, tales from the communities you love, and more

I'm GamesRadar's Managing Editor for guides, which means I run GamesRadar's guides and tips content. I also write reviews, previews and features, largely about horror, action adventure, FPS and open world games. I previously worked on Kotaku, and the Official PlayStation Magazine and website.

The cult vampire third-person shooter that nearly bankrupted the small studio that made it is getting a film adaptation from the Transformers producer

Fallout mod site says it's like players are downloading Skyrim "twice every second" after Amazon TV series drives fans back to the open-world RPGs

Almost every character to ever appear in X-Men comics is featured on this absolutely massive X-Men #700 variant cover