Nothing is easy in the world of Dark Souls 3, and although exploring and experimenting will help you figure out the various systems that shape the game, this approach will also lead you to many untimely deaths in the process. It's easy for a string of unavoidable annihilation to become frustrating, and that's where this guide comes in - offering you a set of tips and tricks to set you on the right path as you explore the Cemetery of Ash, High Wall of Lothric and beyond. Whether you're a Dark Souls veteran or a newcomer to the series, read on for useful advice to get you up and running in the latest instalment.
1. Save Your Souls

When you defeat enemies, they'll sometimes drop Soul items which can be used to gain additional Souls by activating them from your inventory. These range from a meagre 50 from a Fading Soul or 200 for a Soul of a Deserted Corpse, to large items granting many thousands of Souls. Unlike the Souls you collect from actually defeating enemies, these items stay with you when you die so there's no way to lose them until activated, so wait until you're back at Firelink Shrine and ready to spend them before adding them to your Soul count. Once you start defeating bosses you'll also receive Boss Soul items from them, and although these will grant a huge number of Souls you should instead save them as you'll later unlock the option to trade them for special boss weapons and items.
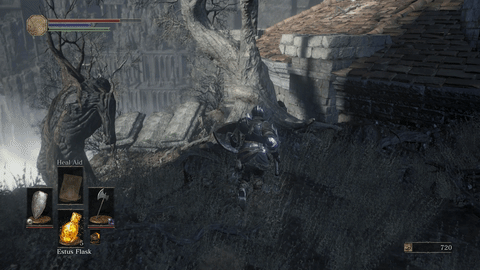
2. Allot Your Estus

For the first time in the Dark Souls series, your character now has two flasks which can be used for recovery - the Estus Flask restores HP for your health, and the new Ashen Estus Flask restores FP for special skills and spells. The Ashen Estus Flask is found right at the start of the game by the fountain, and if you don't pick it up then you can't recover FP (duh) but you also won't be able to upgrade either type of flask, so make sure you have it in your inventory. Once you reach Firelink Shrine, visit Blacksmith Andre and you'll be given the option to Allot Estus. Here you can reassign your total number of flask uses between Estus and Ashen Estus, so you can adjust their allocation to best suit your play style. Should you find any Estus Shards on your travels, bring them to Andre and select the Reinforce Estus Flask option to give you an extra flask use.
3. Get An Early Boost
Heading up through Firelink Shrine and outside at the higher level, you'll find a locked tower which can only be accessed by purchasing the Tower Key from the Shrine Handmaid for a cool 20,000 souls. However, there's a little shortcut in this area you can use to reach the rooftop of the shrine and find some valuable items. Opposite the entrance to the tower, run at the tree then jump over to the rooftop ledge - you may need to reduce your Weight Ratio below 70% to make the leap. Once up on the roof, follow it clockwise until you find an opening leading to the rafters then carefully walk over them to grab the item on top - an Estus Shard to give you an extra flask use. Now head to the far side, along the rafter opposite where you entered and above the largest throne, and carefully strike or roll into the illusory wall ahead to reveal a secret passage. Walk to the end and drop down to the area below, where you'll find a chest containing a Covetous Silver Serpent Ring. When equipped, this gives you more Souls for every enemy you kill, helping you level up quicker.
4. Keep Rolling
During combat, you can click the right stick to lock on to the enemy in front of you, and flick the stick left and right to switch between enemies if there's more than one. Where possible, try to combine this lock with sidesteps or rolls to get behind your foe as they attack, then perform a standard attack from directly behind to execute a backstab to deal much greater damage. All enemies have standard attack patterns, so be patient and study their moves so you can judge when best to strike. When you perform a roll, you have a brief period of invulnerability during the animation, so practice this technique during combat and work on your timing, as this is particularly useful during boss fights. Bear in mind that if your Weight Ratio (displayed in the top right of the Equipment screen) is below 70% then you'll roll faster and further, and that any weapons equipped in the 1-3 slots of either hand count towards this weight - but items carried in your inventory do not. Equip only the weapons you currently need to get this ratio down and you'll be much more manoeuvrable.
5. Use The Environment
You'll no doubt find yourself facing enemies much more powerful than you're equipped to deal with, and taking them on in a straight fight will more often than not lead to your quick and unceremonious death. It is possible to use the environment to your advantage in these situations, and sometimes avoid the fight completely. Once you've attracted the attention of the enemy in question, keep your distance and lure them towards the edge of a large drop. Stand between them and the precipice, then try to get them to attack in your direction before rolling out of the way at the last second. If they haven't already dropped off, give them a quick whack and they should plunge to their doom. If the enemy drops a reward on death you should either receive it immediately, or return to the area after resting at a bonfire to find the item(s) where the character previously spawned.
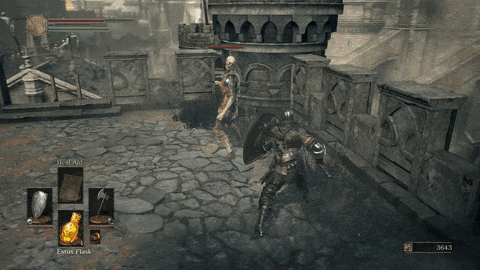
6. Find An Explanation

See that screen above? There's a ton of information on there, and unless you're a returning Dark Souls master you probably haven't got a clue what most of it actually means. Fear not, as there's plenty of in-game help you can call upon to get an explanation. In the Equipment, Inventory or Status screens, hit the prompt for Help then select the Explanation option. Now you can move the cursor over any of the myriad of icons, revealing a description of each one to help decipher your stats.
7. Healing Miracle

By visiting the Shrine Handmaid at Firelink Shrine, you can buy a Talisman and the Heal Aid Miracle, then equip it with the Attune Spell option at any bonfire. You'll need a minimum Faith level of 10 to be able to use the Talisman, so get the relevant upgrades from the Fire Keeper to reach this requirement. Once met, you can equip the Talisman as a weapon then activate it to restore a portion of your HP, as the cost of FP. You should be able to get at least three uses of the Talisman before needing to refill your FP, making it more efficient at recovering HP than the Estus Flask - though obviously not as convenient to use during combat! Find a balance between using the Talisman and Estus Flask to get maximum HP between rests at bonfires.
8. Don't Trust Chests

As you explore, chests are a very welcome sight as they often contain useful items or new weapons to bolster your arsenal. Be warned though - things are not always what they seem, and sometimes they're actually Mimics taking on the form of a chest to trick you. Follow the standard interact prompt and instead of a reward you'll get dragged into the jaws of the beast, probably killing you at lower levels. To protect yourself from this undignified fate, make sure you give chests a quick strike with your weapon before attempting to open them, and be prepared for a fight if it suddenly sprouts legs and comes after you! Be careful to only hit it once though, as a couple of strikes on an actual chest can destroy it along with anything contained inside.
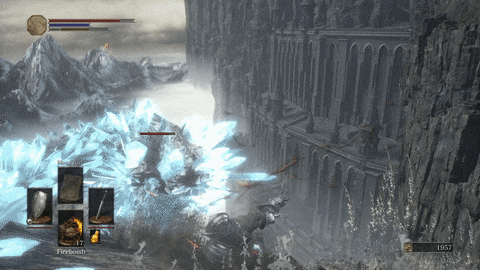
9. Hollow Victory

As you make your way around the High Wall of Lothric you'll come across plenty of hollow soldiers, most of whom are just wailing and gnashing their teeth, and can be picked off for bonus Souls with no issue. However, occasionally you'll approach one and they'll morph into a swirling mass of tentacles and evil, presenting a much tougher foe to fight. If you act quickly enough when you see this happening (or know which hollow soldier to attack from a previous visit) then you can strike them down during the transformation and defeat the monster before it has formed. This will stop you from getting the reward item which drops the first time you beat each of these beasts, so it's worth fighting their final form at least one - keep your distance and fling a handful of firebombs in their direction to make the victory a simple one.
Looking for more help? Then check out our Dark Souls 3 boss guide for a walkthrough of how to defeat every top tier enemy.