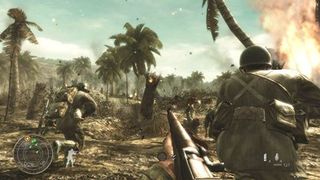
Call of Duty: World at War - level guide
Complete the game and win the war. Right here...
Eviction
In contrast to the last level, Eviction is surprisingly easy. The winding corridors of the first part of the level are ideal for light machine guns, so try and find a PPSH and be sparing with the ammo (it chews up bullets real quick). The first real challenge comes when you hit the lobby area and there are enemies shooting Panzerschreks. Aim for them straight away by keeping to the first-floor corridors, and the rest is easy enough. Once you get outside, fight your way down the left side of the street.

This is a great place to unleash Molotov cocktails as you’re given time to prep and aim them, so throw a few at the bigger groups of Germans. Once at the end of this section head into the subway (it doesn’t matter whether you kill the surrendering Germans or not). If you haven’t already, pick up the double-barreled shotgun and push down through the offices and carriages until the end, where the level finishes with a shootout.
Black Cats
This is an on-rails mission, so there isn’t much in the way of strategy required. We have a few handy tips for you though. Always aim slightly in front of enemy planes of your shells will miss, and always be looking out for the opportunity to rescue survivors (the text can easily be lost near the bottom of the screen). You’ll bag an Achievement for shooting down 45 enemy planes, and for shooting out the spotlights on the carriers so keep that in mind.

Blowtorch and Corkscrew
The first part of this level is quite tough. You’re pushing through long grass against plenty of machine gunners and foxholes. The best way to clear it is to burn the grass and flank to the right until you reach the tunnel network. In here just keep burning away with the flamethrower. When it comes to taking out the machine gun nests, again flanking to the right-hand side seems to be the best option. Make sure everyone inside each nest is cooked before you lob in a charge, otherwise you may not have any chance to escape before blowing it up. And, as always, use smoke as often as you can to get close enough to the bunkers.
Breaking Point
Ok, here it is – the final American stage. Storming the castle is relatively simple CoD stuff. Push forward, use smoke, keep low and you’ll soon find yourself in the central courtyard area. When it comes to taking out the mortar holes here be sure to make liberal use of the mortars you find lying around. There’s no dishonor in sitting behind cover and lobbing as many mortars as you can before moving forwards. Through the next couple of courtyards and you’ll enter the main building.
Pay attention here, because once you emerge on the other side of the area Captain Roebuck will attempt to take two Japanese soldiers prisoner. Kill them quickly, or they’ll detonate a grenade and slay Roebuck. After this, it’s a brutal siege fight. The best tactic here is to stay behind cover with a machine gun and shoot anyone who comes near. Once you have an air-strike available launch it at your target straight away. Each one takes 30 seconds to recharge. Call in three strikes against your targets and it’s mission over.

Heart of the Reich
This level is a toughie, but that’s down to poor level design more than anything else. The preliminaries are straight forward stuff that requires you to keep your head down and push forward. When you get to the Reichstag, things get interesting. Taking out the 88s is surprisingly easy. Make sure you’ve cleared away each crew before planting charges and there’s usually enough cover there to give you time to explode each one. Next up is the stairs to the Reichstag itself. You need to fight up the middle staircase to make the end of level event trigger (a column falling through the barricade), but that’s a tall order. Your best tactic is to push up on the right-hand staircase, allowing your men to follow and take the middle stairs. Then head back down and get onto the middle set and you’ll be able to sprint straight to the top.
Sign up to the GamesRadar+ Newsletter
Weekly digests, tales from the communities you love, and more

Alien TV show confirms its place on the franchise timeline as Foundation star joins the cast

Valheim's massive new Ashlands update gives the survival RPG its "most challenging biome yet" plus raid-like sieges and new endgame weapons

Fallout's surge in popularity has reminded everyone of New Vegas' most overpowered mechanic – bisexuality
Most Popular


