Call of Duty: Ghosts extinction guide

The Cabin
Once you have cleared the city, pick up your $3000 and you will enter this final area that has a bunch of dilapidated wooden buildings. There are five hives here that you will need to deal with and no barriers—but the final hive will have a little something "extra" to deal with—but we’ll get to that in a bit. The first hive you should deal with in this area is inside the barn on the second story.
The barn will be the building located at the far end, straight across from the bridge you walk under, to the right of where you enter. It will have an open garage on the right side and a ladder leading up to the second story. In here will be a hive as well as a Chain SAW gun you can buy for $3000 that does some hefty damage.
There are three hives to deal with in this main area near the buildings and thankfully they are less difficult than those in the city were. By now your skills should be full in a couple categories, so keep dropping full armor and ammo to your team mates. The third hive is always across from the large building with the stone wall, and beside a broken chain fence. Once the drill has destroyed it, you can then pass through into an area with a raised platform and a wide open area with another large hive against the far cliff.

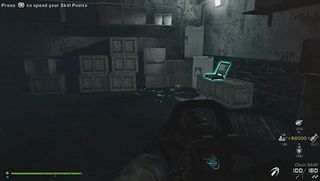
Before going through the newly opened area, enter the passage across from it, along the stone wall, that takes you to the cellar of the building there. In here you will find a laptop against the far wall that you can use to call in an attack chopper to help you. It costs $6000 for it and each player can contribute to it, but for now, only drop $5000 into the laptop.
Exit out of the basement and go through the space where the hive was that you just dealt with and head for the hive that is atop the plateau. Continue fighting and protecting the drill as usually and don’t stop moving until you get the all clear. Once you do, you will have one final hive left to deal with which is arguably the toughest, given your position. Stock up on all the ammo and armor that you can and set the drill in motion.
Prepare for a long defensive position as this drill time is 5 minutes compared to the rest of the non-barrier hives that are 3 minutes or under. Now a huge swarm of enemies will appear of all varieties, although it’s mainly the scorpions that will make life difficult for you with their acid. Make sure you keep an eye on the drill and your team mates as failing the mission at this point would be heartbreaking.
Keep the enemies in your sights; use all you have—turrets, ammo, and armor— restocking every chance you get. There are more than enough enemies to keep your money supply up and not have to worry about running out. Once the hive is finally drilled through, you will notice there is a little something there behind it.
Sign up to the GamesRadar+ Newsletter
Weekly digests, tales from the communities you love, and more
Jeff McAllister is a freelance journalist who has contributed to GamesRadar+ over the years. You'll typically find his byline associated with deep-dive guides that are designed to help you scoop up collectibles and find hidden treasures in some of the biggest action and RPG games out there. Be sure to give Jeff a thanks in the comments while you're completing all of those tricky Achievements and Trophies.

5 million people played Fallout games in a single day, with Fallout 76 alone accounting for 1 million, amid the TV show's massive success

15 days after Wii U servers were supposed to be shut down, the last surviving Splatoon player is still hanging on as the servers crumble around them

Al Pacino and The Guest star to play priests in a new exorcism horror movie based on a true story